|
There are currently no product reviews.
 ;
Very clear copy. No pages missing. Big bonus is that it includes supplement. Price is affordable compared to what others ask for.
;
Found the quality of the copy excellent and a very quick service. I would certainly recommend the service.
;
Good quality, clear diagrams. Exactly what I needed.
 ;
Good product. All the information is invcluded, but due to the complexity of the amplifier, it still is difficult to get it to operation again.
;
Very professional seller; very fast, accurate and rielable service.
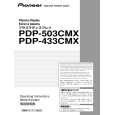
PDP-433CMX, PDP-433MXE
Y DRIVE, SCAN (A) and (B) Assemblies
1
Remove the three screws.
7 8 9
Remove the Rear Case (M). (Screws � 20) Remove the Y DRIVE Assy. (Connector, PCB Spacer � 3, Screws � 8) Remove the Front Chassis V. (Screws � 5)
10 Remove the Scan IC Spring 43L and 43R. (Screws � 1)
Front Case Assy 43 (M)
2 3 4
Loosen a rivet. Remove the Lead Cover MX. Pull out a Flexible Cable.
1
�3
Scan IC Spring (43L)
9 8
�2
Y DRIVE Assy
8
�2
9
SIDE KEY Assy Front Chassis V
10
9 8
�2
8
2
4
Lead Cover MX Scan IC Spring (43R)
8
�2
Rivet 3 Turn it not to press the rivet. (Because when the rivet presses, Lead Cover MX fit in once again.) It is easy to remove when pull out the Lead Cover MX with the rivet before completely removing the rivet.
9
9 5 6
Remove bottom by the fulcrum at the top of Front Case Assy 43 (M). Remove the Front Case Assy 43 (M).
Front Case Assy 43 (M)
11 Reverse the SCAN (A) and SCAN (B) Assemblies.
Rear Case
12 When it is necessary, exchange the ROM.
6
Aluminum Materials It is the structure that a hook of Front Case Assy 43 (M) was put between with Rear Case and aluminum materials. ROM �6 SCAN (A) Assy ROM �6
11
11
5
SCAN (B) Assy
139
|