Very satisfied! I was searching for several days, but nope; till I discovered your webside and there it was at a very reasonable price. Keep up the good work!
Paul
Flanders
I purchased the unit from a private party and the original owners manual was not available. Having the ability to download it was extremely helpful and clarified operating the equipment immensely. This is a complicated unit and without the manual I would not have been able to maximize it's potential. Thank you.
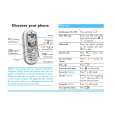
Text excerpt from page 7 (click to view)
MANUTENZIONE
Prima di qualsiasi operazione di manutenzione e pulizia staccare la spina della presa.
1. Mobile
Pulire il mobile della macchina con acqua tiepida e un detersivo neutro non abrasivo. Sciacquare con acqua pulita e asciugare con uno strofinaccio morbido. Importante: non usare alcool, solventi o prodotti similari per la pulizia del mobile.
2. Cassetto detersivo
Smontaggio: Esercitare una leggera pressione sui gancetti posti sui lati del cassetto detersivo e tirarlo verso l'alto (fig. 1 e 2). Pulire il cassetto sotto il rubinetto utilizzando una spazzola o una spugnetta (fig. 3) e controllare che i sifoni situati dietro al cassetto non siano ostruiti (fig.4). Rimontaggio: Rimettere il cassetto nella sua sede e agganciarlo (fig. 5).
fig.3 fig.4
fig.1
fig.2
3. Filtro di scarico
Pulire regolarmente il filtro che si trova nella parte inferiore della macchina. Se si lava della biancheria che perde molti filacci, pulirlo dopo ogni lavaggio. Per eliminare dalla macchina eventuale ristagno d'acqua che non può esser scaricato, porre l'estremità del tubo di scarico in un recipiente di buona capacità e quindi : - per scaricare l'acqua residua: a. aprire lo sportellino del filtro (fig.6) ; b. mettere sotto il filtro un recipiente non troppo alto a bordi diritti. Per completare lo scarico, ruotare il tappo del filtro in senso antiorario fino a che si trovi in posizione verticale, e lasciar defluire l'acqua residua (fig. 7). - per pulire il filtro: a. svitare complemente il filtro e toglierlo (fig.8) ; b. pulirlo accuratamente sotto il rubinetto ; c. rimettere il filtro al suo posto e riavvitarlo ; d. richiudere lo sportellino.