|
There are currently no product reviews.
 ;
This was super service.Ordered this manual and was reading the download an hour later
;
as always, rapid and efficient, very good and clear prints
details clearly visible keep going this way!!!!!!
;
I expect a wonderful result as alaways!!!!!!
Usually is much faster....
;
Wow very wonderful and clear!!!! I will always trust them
;
Providing the manual works fine, quickly and without any problems for an acceptable price. After printing the service manual it took me only a short time to repair my carradio from Clarion. Thank You! Greetings from Heiko
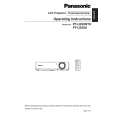
PT-LB30NTU / PT-LB30NTE / PT-LB30NTEA / PT-LB30U / PT-LB30E / PT-LB30EA
5. Unscrew the 4 screws and remove the power block (PModule and B/Q-Module).
6. Unscrew the 3 screws and remove the power box.
7.8.
Removal of G-P.C.Board
1. Remove the A-P.C.Board block according to the steps 1 through 6 in the section 7.3. "Removal of A-P.C.Board". 2. Disconnect the flexible cable between the G-P.C.Board and A-P.C.Board. 3. Unscrew the 2 screws and remove the G-P.C.Board. 7. While pressing to shut each hook of the 4 resinous stands, remove the B/Q-Module.
7.9.
Removal of B/Q-Module
1. Remove the lamp unit according to the section 7.11. "Removal of Lamp Unit". 2. Remove the A-P.C.Board block according to the steps 1 through 6 in the section 7.3. "Removal of A-P.C.Board". 3. Unscrew the 2 screws and remove the lamp unit terminal. 4. Unscrew the 2 screws and remove the exhaust fan .
7.10. Removal of P-Module
1. Remove the power block and power box according to the steps 1 through 6 in the section 7.9. "Removal of B/Q Module". 2. Unscrew the 1 screw. 3. While pressing to shut each hook of the 3 resinous stands, remove the P-Module.
18
|