|
There are currently no product reviews.
 ;
We received the manual in a timely manner and it was exactly what we were expecting.
;
Excellant, finally this is want I need and searching for The service manual is fantastic and thank you to owner-manuals.com and its service. Price is reasonable. It's a bit slow on my end in downloading but manage to receive the whole manual without a break. once again, thanks.
;
Very good scanning quality. All schematics are very legible. Worth every cent !
;
Excellent quality, very quick download turnaround, will definately use again.
 ;
This is a awesome quality scan of the original Service Manual for Technics 8099.
Contains the circuit diagram, PCB layout, adjust/tune instructions as well.
Since this is my first buy here, i'm really glad! This site do works as intended/described, it's definitely not scam!
Мои рекомендации! Все мануалы настоящие!
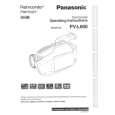
PV-D300 / VM-D100 / PV-L550 / PV-L600 / PV-L650 / VM-L450
5.1.7.
CAUTION:
HOW TO REMOVE A JAMMED TAPE
If loading does not start after DC Power Supply is applied, DO NOT continue applying DC Power Supply.
5.1.7.1.
Remove a jammed tape as follows:
1. Remove a Screw and remove the EVR Cover.
Fig. 4-2
5. Open the Cassette Cover fully.
Fig. 4-1
6. Remove the tape slack by rotating the Takeup Reel Gear of the cassette tape as shown in Fig. 4-3.
2. Place the unit with the Cassette Cover facing upward. 3. Connect the TP Board Kit through the TP Board slot. 4. Apply +3VDC Power Supply to TP20 (+) and TP21 (-) on the TP Board to unload the mechanism. It normally takes approx. 6 seconds to unload the Mechanism to EJECT position. Then, remove the Power Supply and remove the TP Board Kit.
Fig. 4-3
7. Take out the cassette tape. 8. Connect the Power or Battery to set the Mechanism to STOP Position.
20
|