Shopping cart is empty
 
English Polski Spanish 
Search For a Manual
 

(e.g. AA-V20EG JVC, ZX-7 Sony )
PayPal 1000+ rating Secure, Encrypted Checkout.
 
Support Info
ELECTROLUX
First point of contact:
All trademarks are the property of their respective owners
Categories
Information
Featured Product
Home >> REX-ELECTROLUX >> R100A Owner's Manual
 
 0 item(s) in your cart 

REX-ELECTROLUX R100A
Owner's Manual


Tweet about this product and get $1.00 of store credit for instant use!
  • Download
  • PDF Format
  • Complete manual
  • Language: Italian
Price: $4.99

Description of REX-ELECTROLUX R100A Owner's Manual

Complete owner's manual in digital format. The manual will be available for download as PDF file after You purchase it.

Owner's Manual ( sometimes referred to as User's Guide or User's Manual ) contains information on how to use Your device. After placing order we'll send You download instructions on Your email address.

The manual is available in languages: Italian

Not yet ready
You must purchase it first

Customer Reviews
There are currently no product reviews.
Other Reviews
 YACHT BOY 230 GRUNDIG Owner's Manual by Joseph McOscar;
Delivery came quite promptly and in a very readable format. Thank you.
 VRX8370R CLARION Owner's Manual by Leonardo Russo;
I found my Clarion VRX8370R in the Camper I bought and I wasn't able for month to understand it. The Owner Manual was perfect and just what I was searching for. Thank you. Leonardo
 NSXV2100 AIWA Owner's Manual by peter scott;
Very good copy of Manual, clear and easy to print off, arrived very promptly and reasonably priced. Thanks, I will use you again.
 DC942 PHILIPS Owner's Manual by Johan Vanmullem;
Zeer duidelijke afdrukken op A4-formaat , zeer uitgebreide handleiding . Pluspunt ,zeer snelle respons van jullie , binnen de 24h . Top !!!
 STGT1000 TECHNICS Owner's Manual by james burns;
I AM HIGHLY IMPRESSED BY THE EASE OF USE OF THIS DOWNLOAD SERVICE. INSTRUCTIONS ARE CLEAR AND SIMPLE TO FOLLOW....EVEN BY TECHNOPHOBES SUCH AS MYSELF. THE EMAILS POINT YOU IN THE RIGHT DIRECTION...ITS SO EASY PEASY. THE DOWNLOAD CHOICE OF USER MANUALS IS EXTENSIVE AND I COULD NOT FIND A CHEAPER OR MORE EFFICIENT SERVICE ON THE INTERNET. I COULD NOT HAVE MADE A BETTER CHOICE OF INFORMATION PROVIDER. SHOULD I EVER NEED ANOTHER USER MANUAL, THEN THIS IS THE FIRST CHOICE SITE. COULD NOT BE BETTER PLEASED!!!!!!!...MANY THANXES FROM JIM BURNS

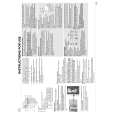
Text excerpt from page 6 (click to view)
132985340.qxd

26/04/2005

10:47

Pagina

6

Installazione
Rimozione dei dispositivi di sicurezza per il trasporto
Prima di mettere in funzione la macchina togliere tutti i dispositivi di sicurezza previsti per il trasporto. Si consiglia di conservare tutti i pezzi per rimontarli, qualora la macchina dovesse essere spostata di nuovo in futuro. 1. Svitare e togliere (con una chiave) le due viti posteriori in basso. Sfilare i due perni in plastica.
P1128

7. Estrarre il relativo perno di plastica. 8. Tappare tutti i fori con i tappi che si trovano nel sacchetto contenente il libretto istruzioni.

P0002

Posizionamento
Prima di installare la macchina nella sua posizione definitiva, ruotare l�estremità del tubo di carico, sul retro della stessa, nella direzione più vicina al rubinetto. Svitare leggermente la ghiera di fissaggio, girare l�estremità del tubo e riavvitare la ghiera, controllando che non ci siano perdite d'acqua.

P1129

P0001

2. Adagiare la macchina sullo schienale, facendo attenzione a non schiacciare i tubi. A tale scopo interporre tra la macchina ed il pavimento un angolare dell�imballo. 3. Togliere il tassello centrale di polistirolo dal fondo della macchina e liberare i due sacchetti in politene.
P0021

1 2 3

Installare la macchina su un pavimento piatto e duro. Fare attenzione che la circolazione dell'aria attorno alla macchina non venga impedita da tappeti, moquette, ecc. Controllare che la macchina non tocchi il muro o altri mobili della cucina. Tenere una distanza di almeno 3-5 cm dai mobili e dal muro.

P1124

4. Sfilare con molta cura, prima il sacchetto sinistro, tirandolo verso destra e verso il basso . 5. Sfilare il sacchetto destro, tirandolo verso sinistra e verso l�alto.

Alimentazione dell�acqua
Collegare il tubo di alimentazione a un rubinetto di acqua fredda filettato da 3/4". Non utilizzare, per l�allacciamento, vecchi tubi già usati in precedenza.

P1126

P1127

6. Rimettere la macchina in piedi e svitare la restante vite sul retro. 6

P1088

You might also want to buy

$4.99

SX-K700 TECHNICS
Owner's Manual

Complete owner's manual in digital format. The manual will be available for download as PDF file aft…

$4.99

CJ-V51 PIONEER
Service Manual

Complete service manual in digital format (PDF File). Service manuals usually contains circuit diagr…

$4.99

GRAND PRIX ELECTRONIC 754 BECKER
Service Manual

Complete service manual in digital format (PDF File). Service manuals usually contains circuit diagr…

$4.99

SX-PR602 TECHNICS
Service Manual

Complete service manual in digital format (PDF File). Service manuals usually contains circuit diagr…

$4.99

EV-S1000E SONY
Owner's Manual

Complete owner's manual in digital format. The manual will be available for download as PDF file aft…

$4.99

GRAND PRIX ELECTRONIC 780 BECKER
Service Manual

Complete service manual in digital format (PDF File). Service manuals usually contains circuit diagr…

$4.99

AG7330 PANASONIC
Service Manual

Complete service manual in digital format (PDF File). Service manuals usually contains circuit diagr…

$4.99

MECABLITZ 60 CT4 METZ
Service Manual

Complete service manual in digital format (PDF File). Service manuals usually contains circuit diagr…
>
Parse Time: 0.255 - Number of Queries: 130 - Query Time: 0.061