|
|
|
Categories
|
|
Information
|
|
Featured Product
|
|
|
 |
|
|
There are currently no product reviews.
 ;
Thanks to Owner-Manuals.com! This manual was exactly what I needed. As Amana was purchased by Maytag and later by Whirlpool, there was no way to receive it from their websites. I was lucky to find this resource.
 ;
Great to be able to set channels again, on an old but stoll fine working TV
;
Good quality instructions manual. Very useful to me. Quick and excellent service from Owner-Manuals... Thanks !!!
;
Sono molto soddisfatto e, quando mi necessiterà, mi avvarrò nuovamente di questo servizio!
;
A comprehensive Operating and Service Manual. All schematics are complete and easy to read. The PCB drawings and complete parts list are very helpful. I would definitely recommend this manual.
Adjusting
the oven temperature
control
Although your new oven is properly adjusted to provide accurate temperatures, it may cook faster or slower than your old oven. If, after using the oven for a period of time, you are not satisfied with the baking/roasting results, you can change the temperature calibration by following these steps:
Single/upper
oven:
1. Push the Bake pad and hold for 4 seconds. The display will show the current offset temperature, for example �OO�, if you have not previously adjusted the temperature. 2. To adjust the temperature, use the Temp pad(s). Push A to raise the temperature or V to lower the temperature in 5°F increments. You can set the temperature change to as low as -35°F or as high as +35�F. A minus (-) sign will appear before the number when decreasing the temperature setting to show the oven will be cooler by the displayed amount. 3. After making the desired adjustment, push any command pad to enter the new offset temperature.
Lower
oven
(double
ovens):
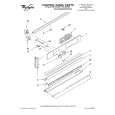
1. Make sure the Oven Temperature Control Knob is turned to the off position. Pull knob straight off and flip it over.
2. Loosen the locking screws inside the control knob. Note the Position of the notches. 3. To lower the temperature, hold knob handle firmly and move the tooth a notch counterclockwise. Each notch equals about 5°F (2.5%). 4. To raise the temperature, hold knob handle firmly and move the tooth a notch clockwise. Each notch equals about 5°F (2.5%). 5. Tighten the locking screws and replace the control knob.
Locking
.Th
Notches
14
|
|
|
> |
|