|
|
|
Categories
|
|
Information
|
|
Featured Product
|
|
|
 |
|
|
There are currently no product reviews.
 ;
Thank´s for your help, I already recived these manual from you
;
Thank you for your manual It has the basic things to and i use the Oszi for Longer Time.
THX
;
Actually, I was looking for this information for 3 years!...now thanks to you, the manual is on my hands and of great help, cause I understand now where I was doing wrong connections and wires...excellent, I'll be back to you if in need, thank you.
 ;
This manual covers the main equipment features only. While it also includes the procedure for saving and loading from the now long obsolete memory cards it does not mention the how to operate with the optional floppy drive interface so I am still at a loss about how to use this! Note that there is a separate manual covering the MIDI interface and programming via the keyboard, not included in this download. You will also need to get hold of this if you want to use the MIDI interface properly. Basically there is little difference between this manual and the free to download manual for the similar PR60 model.
;
Good list of manuals. I found a very rare one and easily get. Should be promptly to download, as we must to wait hours even after confirmed payment.
How to use the optional
griddle
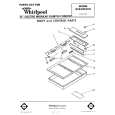
The griddle (Part No. 261950) can be used III any position of either unit. Make sure the correct control knob is used r** ::: or . . . ,..
Before you use the griddle the first time: 1 Lliash it with hot sudsy water. using a sponge or dish cloth Do not jrnmerse griddle in water. (See below. �To clean the griddle .�! 2 Rinse and wipe dry 3 Brush griddle with a iight coating of cooking oil to season It is not rlecessary to grease the non-stick finish each time the griddle ;s used f I( wever. oil. fat or butter will add flavor to food and is an aid in browning To use the griddle: 1 Lift and remove the griddle cover before preheating or cooking. The cover shouid not be replaced until the griddle is cool 2. Preheat griddle for a few minutes. (Until butter melts or a fe\;i Jrops of Lkjatersprinkled on the surface dance in little round beads. I 3 A&i food Use only nylon or plastic utensils. Metal utensiis may xratch the non-stick finish. Do not leave utensils on the hot yr-iddle �They may mdlt 4 XI:V unir off Lcher: finished An empty griddle can be damaged by ., 1711; percods ok� high heat. Repiace griddle cover on],- after gr:ddle �la< coole7d �: j ~5~the iollow~!~y table as a cookjng guide for the griddle IJse higher �Y :,-iuer st�ttlncl, as :lecded for your recipes t L# Medjum (Preheat only UCtil fat meits. i i&i, on High IXied Sandwjcties High Pallcakes High Hr>mburgers Med:um Hugh The Signal Light to &;�I% if�the Module Control Knob will giow whenever the griddle is on. Be sure this light is off when you have finished cooking. To remove
To remove griddle, lift at front and pull toward you.
and clean
the griddle
Make sure the Module Control Knob ISin t!~ �OFF.. p,xjtjon and 31 addle is cool before removing or replacing Kernove the griddle cover using the handle at the front. :.jfr the front of the griddle. using the handle. Raise front just high enough to grasp front edge for easy removal. (See illustration at ieft. 1 Pul! slightly rajsed griddle toward you to unplug it Lift griddle out of cooktop Wash griddle with warm water and detergent. Do not immerse 111 water : I: use abrasive cleansers. Steel wool, metal scounng pads or harsh <l~~ansrrs may scratch the nonstick finish. Kirse and dry the gnddle
Notch o-n bottom of griddle
12
|
|
|
> |
|