|
|
|
Categories
|
|
Information
|
|
Featured Product
|
|
|
 |
|
|
There are currently no product reviews.
 ;
Manual correct, and complete. Downloads cleanly. Format of manual was presumably difficult to PDF to A4, but works reasonably well.
 ;
This was a hard to find manual. When I did find it , some sites wanted way too much for the file.
Owner-manual .com had it for a really reasonable price. Not only that but it was sent very quickly and was a quality scanned document, unlike some others I purchased from a different site.
Good job guys!!
Larry
;
Fast and courteous service. Product delivered as described. Thank you.
;
Last week I bought a second hand Panasonic AG-7500 SVHS Hi-Fi Video Cassette Recorder. It is a professional machine with many video and audio options. I feared it would be a huge quest to find a manual. I was delighted when I found owner-manuals.com. After payment I received the file to download the next day already. The quality is great. I am very happy. Thanks!
;
The owner's manual/operating instructions that I purchased was the original factory document and it was in at least three and maybe more languages. I no longer have it because I sold the tape recorder and included the owner's manual/operating instructions and a service/repair manual that I bought on ebay for the new owner.
Preparing the Commander
Please be sure to carry out the procedures described in �Setting up the commander� on page 6 after inserting the batteries.
4
Close the battery compartment cover. Preparations
Inserting batteries into the commander
Insert the four size-AA (LR6) alkaline batteries (for commander operation) and lithium battery (for preservation of the commander�s internal memory).
1
Remove the battery compartment cover.
Push in direction of arrow
After inserting the batteries, touching the touch panel turns on the light and displays the touch panel (LCD) adjustment screen. Follow the procedure on the next page for touch panel adjustment and initial communication.
2
Insert the alkaline batteries.
Size-AA alkaline batteries
Notes
] } ] } } ] ]
}
� The LCD lights up when touched. � VOL+/�, MUTING and SLEEP can be used even when the LCD is not lit. � Pressing BACK LIGHT/COMMANDER OFF turns the backlight off. Holding it down for about 2 seconds turns the LCD off. To conserve battery power, be sure to regularly turn off the LCD or power when not in use. � If the commander is not used for approx. 1 minute, the LCD turns off automatically (Auto Off function). The auto off time can be adjusted (see page 21).
Always insert the negative (�) pole side of batteries first.
3
Insert the lithium battery. After wiping the lithium battery thoroughly with a dry cloth, insert it into the compartment with the positive (+) pole side facing up.
Coin shaped lithium battery CR2032
Positive (+) pole side up
5
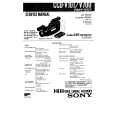 $4.99 RMT501 SONY
Service Manual Complete service manual in digital format (PDF File). Service manuals usually contains circuit diagr…
|
|
|
> |
|