|
|
|
Categories
|
|
Information
|
|
Featured Product
|
|
|
 |
|
|
There are currently no product reviews.
 ;
Excellent printing quality. A complete and very useful manual with all details.
 ;
This is a great site. I placed my order and by the next am it was available for download. Had some problems with some missing copy on some pages. Once I brought the error to the OMC's attention, the issue was resolved. I'll come back again.
;
Mi spiace per non poter scrivere in inglese... ma sono veramente soddisfatto del servizio offerto. Grazie..!!
;
The quality of this manual is good. It has all schematics and setup information for both the MDS-B3 and the MDS-B4. The scan quality is quite good, all pages are readable, This service manual also contains scans of the operating instructions from the User manual.
;
Quick site processing. A complete and very useful manual with all details. Thank you!
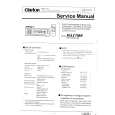
RX-8010RBK/ RX-8012RSL
Removing the main board (See Fig.14)
JI
Prior to performing the following procedure, remove the top cover, the rear panel and audio board. 1. Cut off the tie band fixing the harness. 2. Disconnect the harness from connector CN811 on the power supply board respectively. 3. Disconnect the harness from connector CN881 on the main board. 4. Remove the four screws I and the two screws J attaching the main board.
I J
J I
Main board CN881
CN811
I
Fig.14
Tie band
Removing the Heat sink (See Fig.15 and 16)
1. Remove the two screws L' attaching the heat sink from the rear side of main board. 2. Disconnect the connect CN701, CN702, CN703, CN705 and CN706 on the main board. 3. Remove the ten screws K and four screws L attaching the heat sink.
Heat sink
L'
L'
Main board rear side
Fig.15
Heat sink
K
K
K
L
L
Main board
CN706 CN702 CN705 CN701 CN703
Fig.16
1-6
|
|
|
> |
|