|
|
|
Categories
|
|
Information
|
|
Featured Product
|
|
|
 |
|
|
There are currently no product reviews.
 ;
Great price, Quick delivery, the document was very usefull A+++++++++++++++
;
Great price, Quick delivery, the document was very usefull A+++++++++++++++
;
Great price, Quick delivery, the document was very usefull A+++++++++++++++
;
Great price, Quick delivery, the document was very usefull A+++++++++++++++
;
This service Manual for my JVC AV29BF10EES is very helful. Everything is show in detailed diagrams!!!! If you need really good source of information for this type JVC you are on the right place. I am satisfied and very glad for this excellent book. Thank you.
SA-F21 SECTION 1 GENERAL
A
CD/DVD Player DVP-F21 TV
This section is extracted from instruction manual (3-071-506-11).
B
A-1
C
3
D
1 2
/16 in. 2 3/8 in. (59 mm) (4.5 mm)
3
Parts and controls
1 ?/1 (power) button/indicator 2 MODE (mode) button 3 MASTER VOL (master volume) indicator 4 SW VOL (subwoofer volume) indicator 5 BASS (bass) indicator 6 TREBLE (treble) indicator 7 LEVEL (level) +/� buttons 8 HEADPHONES (headphones) jack
1
to AUDIO OUT L to VIDEO OUT to AUDIO OUT R Video cord (not supplied)
3 4 5 6 7
/8 in. (9 mm) Screws
2
Audio cord (supplied)
Subwoofer Satellite speakers
A-2
#
Screw hole to attach the stand such as WS-FV10A, WS-TV10A, WS-WV10A (not supplied)
3
/16 � 7/32 in.
(4 � 5 mm)
8
3
Insert up to here.
3
Speaker cord (supplied)
English Connecting to the DVP-F21 (fig.A)
Notes
�When you install the speakers on the wall, make sure that the wall is strong enough to hang the speakers. �When you disconnect or connect the cords, take the speakers down from the wall. �For best possible surround sound, place the satellite speakers on both sides of the TV or monitor equal distances apart.
To switch the subwoofer mode to match
Warning
To prevent fire or shock hazard, do not expose the unit to rain or moisture.
Precautions
On safety
Should any solid object or liquid fall into the cabinet, unplug the speaker system and have it checked by qualified personnel before operating it any further.
1 Connect the player to the TV. Use a video cord (not supplied). First remove the jack cover from the player, and then connect the VIDEO OUT jack of the player with the video input jack of the TV. You can use the video/audio cord with red, white and yellow plugs supplied with DVP-F21 instead of the video cord (not supplied). Connect the yellow plug only. If you connect a TV with S VIDEO input jack, use an S VIDEO cord (not supplied). You will enjoy high quality images. 2 Connect the player to the subwoofer. Use the supplied audio cord (with red and white plugs). Connect the AUDIO OUT L/R jacks of the player to the INPUT L/R jacks of the subwoofer. Connect the red plug to the red jack and white plug to the white jack. 3 Connect the satellite speakers to the subwoofer. Use the supplied speaker cords. Connect the cord with stripe to the # terminal. Attach the jack cover to the player. You can install the player in three ways; horizontal, vertical or on the wall. See �Step 3: Attaching the Jack Cover� in the operating instructions supplied with the player. Notes
�Plug cords securely to prevent unwanted noise. (fig. A-1) �Be sure to match the speaker cord to the appropriate terminal: + to + and � to �. If the cords are reversed, the sound will be distorted and will lack bass. (fig. A2)
Playing the Disc (fig D) .
After connecting and setting up the player, you can play the disc.
the bass output of the sound source
1
Turn on the components. TV: Turn on the TV and switch the input selector on the TV to the player. Player: Turn on the player. Press ?/1 (power) on the subwoofer. The subwoofer is turned on and the power indicator changes from red (standby) to green. Press MODE on the subwoofer repeatedly until the MASTER VOL indicator lights up in green. Press LEVEL � to turn down the volume to the minimum.
On power sources
This symbol is intended to alert the user to the presence of uninsulated �dangerous voltage� within the product�s enclosure that may be of sufficient magnitude to constitute a risk of electric shock to persons. This symbol is intended to alert the user to the presence of importantoperating and maintenance (servicing) instructions in the literature accompanying the appliance.
�AC power cord must be changed only at the qualified service shop. �Before operating the speakers, check that the operating voltage is identical with your local power supply. The operating voltage is indicated on the nameplate on the rear of the speakers. �The unit is not disconnected from the AC power source as long as it is connected to the wall outlet, even if the unit itself has been turned off. �If you are not going to use the speakers for a long time, be sure to disconnect the speakers from the wall outlet. To disconnect the AC power cord, grasp the plug itself; never pull the cord.
Step 4: Connecting the Power Cord
Connect the power cord of each component to the wall outlet.
Press LEVEL + and � at the same time on the subwoofer to switch the subwoofer mode between MOVIE and MUSIC. The color of the SW VOL indicator will indicate the current mode. The default setting is MOVIE. Mode Color For sound sources such as MOVIE Green Movies MUSIC Red Music
2
To return the volume setting to the default setting
While pressing LEVEL + and � at the same time, press ?/1 (power) on the subwoofer.
Step 5: Setting Up for the CD/ DVD Player
You may need to make some setups for the player. Refer to the instructions supplied with the components to be connected.
3 4 5 6
Troubleshooting Guide
If you experience any of the following difficulties while using the system, use this troubleshooting guide to help remedy the problem before requesting repairs. Should any problem persist, consult your nearest Sony dealer. The subwoofer automatically entered standby mode. , Auto Power On/Off function worked because no audio signal had been input for about 3 minutes. There is no sound from the speakers. , The system is not connected correctly. , The system is connected by incorrect connecting cords. , The volume is turned down to the minimum. , The headphones are connected. Sound is noisy. , The system is not connected correctly. , Audio equipment or such is placed close to an equipment causing noise such as TV. , The plugs and jacks are dirty. Sound stops suddenly. , The system is not connected correctly. , Short-circuit occurred to the stripped speaker cord.
On placement
� Do not install the appliance in a confined space, such as a bookcase or built-in cabinet. � Do not place the speakers near heat sources, or in a place subject to direct sunlight, excessive dust or mechanical shock. � Good ventilationis essential to prevent internal heat buildup. Place the speakers in a location with adequate air circulation, and in a way that does not block the rear ventilation holes.
If you are using the DVP-F21
When connecting to a wide screen TV, the image may not fit your TV screen depending on the disc. If you want to change the aspect ratio, select �SCREEN SETUP� in the Setup Display and then adjust the �TV TYPE�setting, see �Settings for the Display (SCREEN SETUP)� in the operating instructions supplied with the player.
Insert the disc in the player. Press H on the player. Playback starts. Adjust the volume with LEVEL +/� on the subwoofer.
For customers in the U.S.A. Owner�s Record
Using the headphones
Connect the headphones (not supplied) to the HEADPHONES jack on the subwoofer. To adjust the volume, press MODE on the subwoofer repeatedly untilthe MASTER VOL indicator lights up. Then press LEVEL +/�. z The subwoofer automatically enters standby mode (Auto Power On/Off function)
If no audio signal is input to the subwoofer for about 3 minutes, the subwoofer automatically enters standby mode and the ?/1 (power) indicator changes to red. When an audio signal is input, the subwoofer turns on automatically and the ?/1 indicator changes to green. The Auto Power On/Off function works only when no audio signal is input for about 3 minutes. If you want to turn off the subwoofer at once, press ?/1 (power) on the subwoofer.
On operation
The model and serial numbers are located at the rear of the unit. Record the serial number in the space provided below. Refer to them whenever you call upon your Sony dealer regarding this product. Model No. SA-F21 Serial No.______________
�When turning on or off the subwoofer or other equipment, lower the volume of the subwoofer to minimum. �To avoid damaging the subwoofer: � Be careful in setting the volume control of the subwoofer to avoid an excessive input power. � Do not open the enclosure or remold speaker units and networks. � The grillnet is not removable. Do not remove it.
NOTE:
This equipment has been tested and found to comply withthe limits for a Class B digital device, pursuant to Part 15 of the FCC Rules. These limits are designed to provide reasonable protection against harmful interference in a residential installation. This equipment generates, uses, and can radiate radio frequency energy and, if not installed and used in accordance with the instructions, may cause harmful interference to radio communications. However, there is no guarantee that interference will not occur in a particular installation. If this equipment does cause harmful interference to radio or television reception, which can be determined by turning the equipment off and on, the user is encouraged to try to correct the interference by one or more of the following measures: � Reorient or relocate the receiving antenna. � Increase the separation between the equipment and receiver. � Connect the equipment into an outlet on a circuit different from that to which the receiver is connected. � Consult the dealer or an experienced radio/TV technician for help.
On the speaker system
Although this speaker system is magnetically shielded, there may be cases where the picture on some TV sets becomes magnetically distorted. In such a case, turn off the power of the TV set once, and after 15 to 30 minutes turn it on again. If there seems to be no improvement, locate the speaker system further away from the TV set. Also, be sure not to place objects in which magnets are attached or used near the speaker system, such as audio racks, TV stands, and toys. These may cause magnetic distortion to the picture due to their interaction with the system.
Connecting to a component other than the DVP-F21
Connect the SA-F21 in the same way as the DVPF21. Connect the audio output L/R (front L/R) jacks of your player to the INPUT L/R jacks of the subwoofer in step 2.
Adjusting the speakers
To select the volume to be adjusted
Step 3: Installing Speakers
For greater flexibility in the positioning of the satellite speakers, use the supplied speaker stands. (fig. B) Speaker stands WS-FV10A, WS-TV10A, and WSWV10A are also available on option. You can install the satellite speakers on the wall using commercially available screws. (fig. C)
On cleaning
Clean the cabinet, panel and controls witha soft cloth slightly moistened with a mild detergent solution. Do not use any type of abrasive pad, scouring powder or solvent such as alcohol or benzine. If you have any question or problem concerning your speaker system, please consult your nearest Sony dealer.
1
Press MODE repeatedly to turn on the desired volume indicator (MASTER VOL for entire volume or SW VOL for subwoofer volume). Press LEVEL +/� to adjust the volume.
2
If you are using the DVP-F21
If you set the TV/DVD switch on the remote to DVD, you can adjust the entire volume with VOL +/� on the remote.
CAUTION
You are cautioned that any changes or modifications not expressly approved in this manual could void your authority to operate this equipment.
Setting Up
Step 1: Unpacking
Check that you have the following items: �Audiocord (with red and white plugs) (1) �Speaker cords (2.5 m) (2) �Speaker stands (2) �Stand screws (8) �Washers for stand screws (8)
You need to determine the appropriate hanging screws and/orother necessary hardware needed to securely and safely fasten the speakers to the wall. Please be sure you have selected fasteners or screws that will fit in the hanging holes on the rear of the speaker. Placement of the screws should be at the same height and should be 2 3/8 in. (59 mm) apart. The screws or other fasteners should protrude by 3/16 in. to 7/32 in. (4 to 5 mm). You may also mark placement of the screws or fasteners by use of something like a template. Hang the speakers on the screws and push the speakers so that they fit against the wall.
z Some
For customers in Canada CAUTION
TO PREVENT ELECTRIC SHOCK, DO NOT USE THIS POLARIZED AC PLUG WITH AN EXTENSION CORD, RECEPTACLE OR OTHER OUTLET UNLESS THE BLADES CAN BE FULLY INSERTED TO PREVENT BLADE EXPOSURE.
of the remote that can control Sony AV amplifiers (receivers) may be able to control the volume of this system.
To select a range to be adjusted
1
Step 2: Connecting Speakers
Before you start, turn off the power and disconnect the power cord of each component. Refer to the instructions supplied with the components to be connected.
Press MODE repeatedly to turn on the desired range indicator (BASS for the low frequency range or TREBLE for the middle to high frequency range). Press LEVEL +/� to adjust the volume.
2
1-1
1-2 E
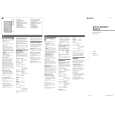 $4.99 SAF21 SONY
Owner's Manual Complete owner's manual in digital format. The manual will be available for download as PDF file aft…
|
|
|
> |
|