|
|
|
Categories
|
|
Information
|
|
Featured Product
|
|
|
 |
|
|
There are currently no product reviews.
 ;
Useful manual, good scan, worth the pay if you find the unit difficult to operate.
 ;
Exactly as described, the full user-manual (145 pages). Perfect.
GAMMA
You can associate the picture�s color shade on the screen with the picture�s original color shade.
GAMMA GAMMA 1 GAMMA 2 GAMMA 3
SMOOTHING
If the picture displayed at the FULL2 or FULL1 mode of ZOOM is not smooth, use the picture smoothing function.
SMOOTH I NG TEXT S TA N DA R D GRAPH I CS
1 2 8 0 x 1 0 2 4 / 6 0Hz EX I T
1 2 8 0 x 1 0 2 4 / 6 0Hz EX I T
1
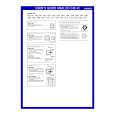
Press the MENU button. The main menu appears on the screen. Press the M/m buttons to select (GAMMA) and press the OK button. The GAMMA menu appears on the screen. Press the M/m buttons to select the desired mode.
1
Press the MENU button. The main menu appears on the screen. Press the M/m buttons to select (SMOOTHING) and press the OK button. The SMOOTHING menu appears on the screen. Press the M/m buttons to select the desired mode. The smoothing effect becomes stronger in the order of TEXTtSTANDARDtGRAPHICS. � TEXT: To make the characters appear clear. (This mode is suited for text-based applications.) � STANDARD (The default setting): Standard smoothing effect. � GRAPHICS: To make the pictures appear clean. (This mode is suited for CD-ROM software such as photo images or illustrations.)
2
2
3
3
ZOOM
The monitor is set to display the picture on the screen in full, irrespective of the picture�s mode or resolution in the default setting (FULL2). You can also view the picture in its actual aspect ratio or resolution.
ZOOM FULL2 FULL1 REAL
US
Notes � When you set the (ZOOM) menu to REAL, the (SMOOTHING) menu is not available. � 1280 � 1024 resolution signals are shown only in REAL mode and SMOOTHING is not possible.
1 2 8 0 x 1 0 2 4 / 6 0Hz EX I T
1
Press the MENU button. The main menu appears on the screen. Press the M/m buttons to select (ZOOM) and press the OK button. The ZOOM menu appears on the screen. Press the M/m buttons to select the desired mode. � FULL2 (The default setting): The input signal is displayed on the screen in full, irrespective of the picture�s mode or resolution. � FULL1: The input signal is displayed on the screen at its actual aspect ratio. Therefore, black bands may appear at the top and bottom of the picture depending on the signal. � REAL: The input signal is displayed on the screen at its actual resolution. Sub-1280 � 1024 signals are displayed at the center of the screen surrounded by a black frame.
2
3
Note When you use 1280 � 1024 resolution signals, the above mentioned settings are not available. The picture is displayed on the screen in full.
15
 $4.99 SDMP82 SONY
Service Manual Complete service manual in digital format (PDF File). Service manuals usually contains circuit diagr…
|
|
|
> |
|