|
|
|
Categories
|
|
Information
|
|
Featured Product
|
|
|
 |
|
|
There are currently no product reviews.
 ;
great site, the most easy and fastest way to find the manual you need, no 5 star because the manual was only available in german, but I speak german as well so no problem for me.
 ;
thanks for this download i got a pioneer bdp-lx70a blu-ray player and it had no manual i search everywhere on the internet and came across owner-manuals.com and i found that it was so easy to find and downloaded from this site if i ever need a manual again this would be the first place that i would come too thanks guys
;
Superb! It's the original manual. We can now use our old calculator with its full function.
;
This is a very well written and comprehensive manual. It answered all our queries.
;
Excellent copy that was delivered within 12 hours and solved my problem.
To Broil:
Baking and Roasting
Do not place food or cookware directly on the oven door or the oven bottom. Before baking and roasting, position the racks according to the �Positioning Racks and Bakeware� section. When roasting, it is not necessary to wait for the oven to preheat before putting food in, unless recommended in the recipe. To Bake or Roast: 1. Push in and turn the oven control knob to the desired temperature setting. 2. Place food in oven. The oven burner will cycle on and off to keep the oven temperature at the setting. 3. Push in and turn oven control knob to OFF when finished.
1. Open the broiler door and take out the broiler pan and grid. 2. Place food on the grid so grease can drain down into the lower part of the broiler pan. 3. Place the pan on the broiler rack and close the broiler door. 4. Push in and turn the oven control knob to broiler position. The temperature can be lowered at any time during the broiling by turning the oven control knob to the desired temperature. 5. Push in and turn oven control knob to OFF position when finished.
BROILING CHART
For best results, broiler pan should be rotated at the same time the food is turned. Times are guidelines only and may need to be adjusted for individual foods and tastes. COOK TIME minutes SIDE 1 SIDE 2 15-17 11-13 7-8 5-6 11-13 6-8 14-17 19-21 10-12 12-14 16-17 15-17 11-13 3-4 2-3 6-7 3-4 8-9 9-10 5-6 6-7 8-9
Broiling
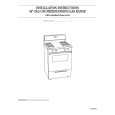
BROILER
The broiler is located below the oven door. The broiler pan and grid slide out for easy access. Always broil with the broiler and oven doors closed. s To avoid damage to the broiler, do not step on or apply weight to the broiler door while it is open.
s
FOOD Chicken, bone-in pieces, boneless breasts Fish Fillets ¹ �-³ �" (1.25-1.8 cm) thick Frankfurters Ground meat patties ³ �" (1.8 cm) thick, well done* Ham slice, precooked ¹ �" (1.25 cm) thick Lamb chops 1" (2.5 cm) thick Pork chops 1" (2.5 cm) thick Steak 1" (2.5 cm) thick, medium rare, medium well-done
Do not preheat broiler before use. Completely close broiler door during broiling. Do not use broiler cavity for storage. Use only the broiler pan and grid provided with the appliance. It is designed to drain juices and help avert spatter and smoke. For proper draining, do not cover the grid with foil. The bottom of the pan may be lined with aluminum foil for easier cleaning. Trim excess fat to reduce spattering. Slit the remaining fat on the edges to avert curling. Pull out oven rack to stop position before turning or removing food. Use tongs to turn food to avoid the loss of juices. Very thin cuts of fish, poultry or meat may not need to be turned. After broiling, remove the pan from the oven when removing the food. Drippings will bake on the pan if left in the heated oven, making cleaning more difficult.
s s
s
s
*Place up to 12 patties, equally spaced, on broiler grid.
s
s
9
|
|
|
> |
|