|
|
|
Categories
|
|
Information
|
|
Featured Product
|
|
|
 |
|
|
There are currently no product reviews.
 ;
The manual was made available promptly. I is a clean scan of the original. I had no problem downloading it. The scan was well centered and cleanly formatted. It is as good a product as can be had without being the original document.
 ;
Received downlink in less then 8 hours, Item was in good copy condition, and told me how to program the clock timer. The price was very resonable, and the process was very automated and was GREAT to work with.
;
Fast service, document is OK. Thanks! Searched for it long time.
;
I was very pleased with the manual I got for my amateur (ham) radio. Without it I could not figure out how to input and/or change the P/L setting on my radio. It drove me nuts as the radio was essentially useless. That all changed when my manual came. Then it took only minutes and I was done. Now my radio works fine. This is an exceptionally good resource as it's a very easy and user friendly download. Thank you very much! Dziękujemy za!
;
It answered my question, which was how to load the paper. I did notice that the very end of the manual was not visible.
16
Selection of possible transmission frequencies
17
Entering and assigning a channel number
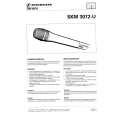
Your SKM 3072-U hand-held transmitter can be operated on one of up to 32 different frequencies. These frequencies and their sequence are preprogrammed by the factory and must only be changed by your Sennheiser distributor who has the required specialist equipment. Press the SET button to get into the setting mode. If you press SET again, the display indicates the transmission frequency in alternation with the channel number. With the / frequency. buttons you can now change the transmission
You can assign channel numbers to the pre-programmed frequencies (u chapter 16). These channel numbers (from 001 to 255) can be entered directly on the SKM 3072-U hand-held transmitter. Press the SET button to get into the setting mode. If you press SET twice, either �CH---� or the channel number which has been assigned to the currently selected transmission frequency begins to flash on the display. With the / buttons you can now select the desired channel number. Holding down a button initiates fast search, continually cycling from the beginning. Press the SET button for more than a second to store your setting. �Set� briefly appears on the display, indicating that the new setting has been stored. The display then switches back to the standard display.
If the transmission frequencies have been assigned channel numbers, the channel numbers are indicated in alternation with the transmission frequencies. If no channel numbers are assigned, �CH---� appears on the display. => Entering and assigning a channel number (u chapter 17) Press the SET button for more than a second to store your setting. �Sto� briefly appears on the display, indicating that the new setting has been stored. The display then switches back to the standard display.
Note: If you do not press any of the three programming buttons for more than 14 seconds, the transmitter returns to the frequency to which it was last set and the display switches back to the standard display. The channel number which was last selected is also kept.
Note: Only after your setting has been stored � i.e after you have pressed the SET button for more than a second � does the PLL switch to the new transmission frequency, the display then ceases to flash. You can discontinue your preselection by briefly (!) pressing the SET button. If you do not press any of the three programming buttons for more than 14 seconds, the transmitter returns to the frequency to which it was last set and the display switches back to the standard display.
36
37
|
|
|
> |
|