|
|
|
Categories
|
|
Information
|
|
Featured Product
|
|
|
 |
|
|
There are currently no product reviews.
 ;
Manual was destroyed and this purchase made it possible to recover my manual . It was easy to down load and smooth to use thanks .
 ;
Turns out this was not the manual i was looking for. The concertmate 670 keyboard i have is a "Realistic" model made for Radio Shack and none of the diagrams on the owners manual i received matches up. HOWEVER, I must say the service Owners Manual provides was fast and efficient by being available online. The manual was in good readable condition and easily downloaded.
;
Great price, Quick delivery, the document was very usefull A+++++++++++++++
;
Thank´s for your help, I already recived these manual from you
;
Thank you for your manual It has the basic things to and i use the Oszi for Longer Time.
THX
SPEAKER CONNECTIONS
CONNECTION TIPS The wires for both speakers should be the same length. If one speaker is placed closer to the amplifier than the other, hide the excess wire behind the wall. Speakers and electronics terminals have corresponding (+) and (�) terminals. Most manufacturers of speakers and electronics, including JBL, use red to denote the (+) terminal and black for the (�) terminal. It is important to connect both speakers identically: (+) on the speaker to (+) on the amplifier and (�) on the speaker to (�) on the amplifier. Wiring �out of phase� results in thin sound, weak bass and a poor stereo image. With the advent of multichannel surround-sound systems, connecting all of the speakers in your system with the correct polarity remains equally important in order to preserve the proper ambience and directionality of the program material.
EXISTING CONSTRUCTION
SP5, SP6, SP8
�1/2" �1/2" �1/2"
Remove the grille from the speaker frame.
Determine the correct speaker location. Note: Remove the inner template, which is the paint shield, at the perforation. Use the outer template when cutting the drywall.
Note: Always allow at least one-half inch between a wall stud and the speaker cutout or the locking tabs will not be able to swivel into place.
WIRE LENGTH
RECOMMENDED SIZE
Up to 20 ft. Up to 30 ft. Greater than 30 ft.
16 gauge 12 gauge 10 gauge
Cut the drywall.
INSTALLATION
The SoundPoint� Series in-wall speakers were designed to be easily installed. However, if you are unsure of your ability to properly install these loudspeakers, please contact your dealer or a qualified installer. TOOLS NEEDED
Connect the speaker wires to the speaker.
Place the frame assembly in the wall.
Pencil
Phillips #2 screwdriver
Measuring tape
Utility knife
Screw down each of the four Phillips head screws. The locking tabs will swivel into place and secure the unit to the rear surface of the drywall.
Replace the metal grille.
Carpenter�s level
Awl
4
5
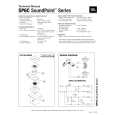 $4.99 SP6C JBL
Service Manual Complete service manual in digital format (PDF File). Service manuals usually contains circuit diagr…
|
|
|
> |
|