|
|
|
Categories
|
|
Information
|
|
Featured Product
|
|
|
 |
|
|
There are currently no product reviews.
 ;
Superb! It's the original manual. We can now use our old calculator with its full function.
;
This is a very well written and comprehensive manual. It answered all our queries.
;
Excellent copy that was delivered within 12 hours and solved my problem.
 ;
I did not have the manual for a Whirl Pool gas dryer, therefore I purchased it from Owner-manuals. This is exactly what I needed. Thank you for the service.
;
I was so pleased to get the owner`s manuel within one hour! Thanks again.
Regards
Werner
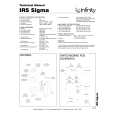
A
Head band Light reflector Support band
Getting Started
Installing the Battery
(See Fig. B) 1 While pressing the battery compartment lid, slide it to open. 2 Insert one size AAA (R03) battery (not supplied) with correct polarity. 3 To close the lid, press and slide the lid down until it clicks. When to replace the battery
Replace the battery when the sound becomes weak or distorted. Remove the old battery and insert a new one.
FM flexible antenna
Battery compartment Driver units
TUNE
POWER
Battery life (approximate hours) Sony alkaline size AAA (LR03) FM reception AM reception 80 100 Sony size AAA (R03) 40 50
Dial scale
VOL BAND
Notes on the battery
� Align the battery correctly. � The dry battery cannot be charged. � To avoid damage from possible battery leakage, remove the battery when unit will not be used for a long time.
SENS
Wearing the Radio 1 Pull out the support band fully from
B
AAA (R03) x 1
2
the headband. Adjust the headband and the support band to fit your head.
Note on the support band (See Fig. A)
When the radio not in use, put the support band back by pushing down both ends as illustrated and push it back underneath the headband.
Insert the # side of the battery first.
Note on the light reflector (See Fig. A)
This reflector reflects a car light at night for your safety.
Playing the Radio
1 2
Set POWER to ON. Set BAND to select FM or AM.
For FM, set SENS to LOCAL if interference is prevalent and reception is too strong. Under normal condition, set it to DX.
3 4
Turn TUNE (tuning) to tune in a station. Adjust the volume using VOL.
To turn off the radio
Set POWER to OFF.
 $4.99 SRFH3 SONY
Service Manual Complete service manual in digital format (PDF File). Service manuals usually contains circuit diagr…
|
|
|
> |
|