|
|
|
Categories
|
|
Information
|
|
Featured Product
|
|
|
 |
|
|
There are currently no product reviews.
 ;
I used for first time this the wheat and am very thanked
;
This manual was exactly what i needed and could not find elsewhere. Price is not too high. Great !
;
ecelent I was reciver the service manual soon I fell so happy very complete 100% positive all by this store tanks atte Luis salazar
 ;
A great copy of the manual, and the only one I could find anywhere on the net! The circuit diagrams are easily readable, all component values marked and easy to see. A highly appreciated download!
;
Great Manual. This manual is available no where else. It was exactly what I was looking for.
SRF-HM01V SECTION 1 GENERAL
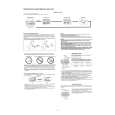
POWER ON/OFF Hang the hooks on your ears. Neckband Neckband Hook (L, R) Battery compartment lid
This section is extracted from instruction manual.
L (Left)
TV/WB/FM SENS DX/LOCAL Driver Unit
R (Right)
VOL*1 TUNE +*2/� Display Light reflector (R, L)
This reflector reflects car lights at night for your safety. *1 There is a tactile dot beside volume to show the direction to turn up the volume. *2 The TUNE + button has a tactile dot.
BAND
MEGA BASS/CLOCK ENTER
MODE
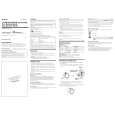
Setting the Clock
The clock time display of this unit is a 12-hour system. When the battery is first installed, �AM 12:00� flashes in the display.
Changing AM Channel Step
The AM channel step differs depending on areas. The channel step of this unit is factory-set to 10 kHz. Change the settings as shown below to be able to listen to the radio. Area North and South American countries Other countries Channel step 10 kHz 9 kHz
1 2
Set POWER to OFF to turn off the power. Hold down MEGA BASS/CLOCK for more than 2 seconds until �AM 12� starts flashing.
Note When the AM channel step is changed, only the preset stations on the AM band will be initialized.
3
Press TUNE + or � to adjust the hour, then press MEGA BASS/CLOCK.
If you hold down TUNE + or �, the digit changes rapidly. �AM 12:00 �= midnight, �PM 12:00 �= noon.
1 2
Set POWER to OFF to turn off the power. While holding down MODE, hold down TUNE + or � for more than 5 seconds.
The channel step will change and �9� kHz (or �10� kHz) will flash for 3 seconds in the display. If you proceed to step 2 again, the channel step changes again.
4
Repeat step 3 above to adjust the minute.
�:� starts flashing and the clock starts operating. To set the current time exactly to the second, adjust the minute and then press MEGA BASS/CLOCK to synchronize with a time signal (such as the telephone time signal).
Note If you do not press TUNE + or �, or MEGA BASS/CLOCK within one minute, the clock setting mode will be canceled.
3
|
|
|
> |
|