|
|
|
Categories
|
|
Information
|
|
Featured Product
|
|
|
 |
|
|
There are currently no product reviews.
 ;
Dear Sirs,
Thank you for the fast support, the manual does provide all necessary information to repair the radio. All schematics are in a good quality for reading.
The manual fits 100% to my requirements as a technican.
Kind regards Thomas
;
the big video recorder format s-vhs many features delicate in loading system of the cassette. Such machines are no longer manufactured, it would be too expensive.
 ;
THIS MANUAL IS VERY GOOD AND VERY CLEAR
PLEASE NOTE IT DOES NOT CONTAIN THE SETUP INFORMATION TO ALIGHN THE GEARS IN THE CD MECH IT DOES SHOW ALL THE PARTS AND THEIR LOCATIONS .
;
Complete service and operation manual. All schematics are there, all circuit boards AND add-on boards. Including exploded views ,component names and specifications. Also electrical and mechanical adjustment procedures are in this manual. This manual also covers the more advanced BR-S811E unit. Scan quality is fair and usable.
;
High quality scan of original Service Manual. Everything´s fine!
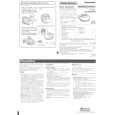
Powered Subwoofer
SUB 6/10
SUB6/10 CONTROLS
1. Volume/Power - This knob controls the volume as well as the power status of the subwoofer. The Sub6/10 subwoofers incorporate an AutoTurn-On/Off Circuit. Turn the volume knob completely counterclockwise to turn the subwoofer OFF. 2. LED - Red/Green. This LED indicates the Mode status that the subwoofer is in. The LED will light Green when the Volume knob is turned clockwise to ON. The LED will light Red when the Volume knob is turned off (the knob turned fully clockwise) or the receiver/amplifier has been turned off for five minutes. The subwoofer will turn on when your receiver/amplifier begins playing again. 3. Crossover Frequency - The crossover frequency knob determines the highest frequency your subwoofer will reproduce. It allows a seamless transition from the subwoofer to the satellite speakers. 4. Phase - The phase switch is used to adjust the relative polarity of the subwoofer. 5. High Level Inputs - These High Level Inputs are for receivers that do not have line-level �pre-amp out� or �subwoofer out� jacks. When a pair of main or
satellite speakers are attached to the OUTPUT terminals, they are driven the full range of frequencies as generated by the music source (receiver, amplifier, etc.) 6. Low Level Input - These left and right Line Level Inputs are normally used when the receiver/ processor has line-level �pre-amp out � or �subwoofer out� jacks. 7. Mono/Stereo - This setting of this switch affects the subwoofer when using the Low Level Input only. If you are using a dual (stereo) RCA cable, set the switch to STEREO; if using a single (mono) RCA cable, plug into the (R) Input Jack and set the switch to MONO. 8. Low/High - The setting of this switch depends on which method of Input Connection you will be using. When using the Low Level Input (RCA Connectors), set the switch to LOW; when using the High Level Input (Speaker Connectors), set the switch to HIGH. 9. Fuse - Use only same type of fuses. Use a 3.15A 250V fuse for the 120 volt American version and use a 4A 250V fuse for the 230 volt European version.
3
|
|
|
> |
|