Thr Video Recorder i have is quiet Old and the Producer could Not help me. So i w as very glad to find an offer for the owners Manual for a very fair Price.a I obtained the original Manual very quick and I am happy to have it now.
The PDF copy was immediately available on download after the payment. However, I noticed that the document was in German, and Ihad to contact a German translator to get it translated it to English. The quality of document is legible can be used for my purpose.
The manual was complete and of great quality. Originally a tri-lingual file, I first received only one language. After a note to owners-manuals.com, I quickly received the remaining languages... Great service, definitely worth it.
Thank you for providing this manual and at low cost.
The Philips scope is of excellent quality, longevity and build and had a couple of faults
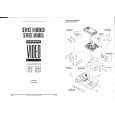
when it was passed to me. Having the CCT diagrams is a blessing.
I have fixed the problems and also modded the scope to my requirements.
I have built a 24v Li-Ion pack for portable use from old but good laptop batts.
it is working beautifully and I am well pleased. Keep up the good work Guys.
manual was very helpful in learning how to propery use my washer. I could not find this manual anywhere else.
Text excerpt from page 27 (click to view)
5. Scharniere A von Einfülltür abschrauben, um 180° drehen, auf gegenüberliegender Seite wieder einsetzen und festschrauben. 6. Abdeckplatten B und C um 180° gedreht auf der jeweils gegenüberliegenden Seite wieder einsetzen. 7. Abdeckplatten E von der Gerätevorderwand abschrauben, um 180° drehen und auf der gegenüberliegenden Seite anschrauben. 8. Türverriegelung F losschrauben, etwas nach unten drücken und aus der Gerätevorderwand herausnehmen. 9. Kabelstecker von Türverriegelung F abziehen. 10. Den Rastknopf von Abdeckung G unten eindrücken, Abdeckung etwas nach unten drücken und aus Gerätevorderwand herausnehmen. 11. Kabelstecker von Abdeckung G abziehen. 12. Türverriegelung F auf die gegenüberliegende Seite umsetzen, den Kabelstecker einstecken und Türverriegelung festschrauben. 13. Auf der anderen Seite den Kabelstecker in Abdeckung G einstecken, Abdeckung einsetzen und Rastknopf einrasten lassen. 14. Einfülltür mit den Scharnieren in die Aussparungen an der Gerätevorderwand einsetzen und festschrauben. 15. Nach Wechsel des Türanschlags die Funktion der Taste T�R überprüfen. Hinweis zum Berührungsschutz: Das Gerät ist erst dann wieder betriebssicher, wenn alle Kunststoffteile eingesetzt sind.