|
|
|
Categories
|
|
Information
|
|
Featured Product
|
|
|
 |
|
|
There are currently no product reviews.
 ;
I purchased the unit from a private party and the original owners manual was not available. Having the ability to download it was extremely helpful and clarified operating the equipment immensely. This is a complicated unit and without the manual I would not have been able to maximize it's potential. Thank you.
;
Being a user of older radios of many kinds, preferring them over more modern rigs, this manual was invaluable in the programming of my two. I now know for certain what the assorted buttons functions are, and am very grateful to have found this excellent site. Many thanks for your assistance, Tony.
 ;
Clear and easy to read. All details as expected. Price acceptable , and quick delivery.
;
Quick response and exactly what I was looking for and at a great fair price!
;
5 star quality on these downloadable manuals. Easy to read and all the information is there. A must when doing a custom install or needing to service your precious old school electronics.
Advanced Recording Operations
Fading In and Out (Fader)
You can gradually increase the recording level at the beginning of a recording (fade in) or gradually decrease the recording level at the end of a recording (fade out). It is convenient to use this function, for example, when the tape reaches to its end and you don�t want the track to be cut off abruptly.
AUTO indicator
Dubbing a Tape
You can copy a tape in deck A to a tape in deck B at normal or high speed.
DIRECTION MODE ª/· HIGH/NORMAL
U
0
)
0
)
p
�
ª
R r
·
p
ª
P R
·
r
P
§
§
U
p
0 ) 0 )
PAUSE P
p
�
ª
R r
·
p
ª
P R
·
r
P
1
FADER
Insert a recorded cassette into deck A and a blank cassette into deck B. Make sure the record-protect tabs on the cassette in deck B have not been removed.
§
§
To
Fade in
Do the following:
1 Follow Steps 1 to 4 of �Recording on a Tape� on page 6. 2 Start playing the program source and press FADER at the point where you want the fade-in to start. During fadein, the AUTO indicator flashes. When the fade-in has completed, the AUTO indicator lights up if the Auto Rec Level function is working, or goes off if the Auto Rec Level function is not working.
2
Select the side(s) to be recorded on. To record on
One side Both sides
Set DIRECTION MODE to
A a. Recording on the reverse side on deck B starts independently of playback on deck A. RELAY. Recording on the reverse side on deck B starts simultaneously with playback of the reverse side on deck A.
Fade out
While you�re still recording, press FADER at the point where you want the fade-out to start. When the fade-out has completed, �REC� flashes in the display and the deck pauses.
3
Select the dubbing speed. To select
Normal speed High speed
Press HIGH/NORMAL
Once Twice
Note
Fade-in or fade-out is not possible when the REC LEVEL control is manually set to 0 (minimum) (see page 7).
�HIGH� or �NORM� appears in the display. The deck changes to dubbing standby.
4
Select the side from which to start dubbing. To record from
The front side The reverse side
Press
· ª
5
Press PAUSE P on deck B to start dubbing.
(Continued)
13
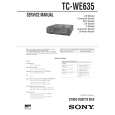 $4.99 TCWE635 SONY
Service Manual Complete service manual in digital format (PDF File). Service manuals usually contains circuit diagr…
|
|
|
> |
|