|
There are currently no product reviews.
 ;
Excellent printing quality.
A complete and very usefull service manual with all details.
GREAT SERVICE AT VERY LOW PRICE!
A+++++++++++++++++++++++++
;
We received the manual in a timely manner and it was exactly what we were expecting. Excellent replacement for original Service Manual.
All schematics are very legible. We are really satisfied.
;
We received the manual in a timely manner and it was exactly what we were expecting. Excellent replacement for original Service Manual.
All schematics are very legible. We are really satisfied.
;
We received the manual in a timely manner and it was exactly what we were expecting. Excellent replacement for original Service Manual.
All schematics are very legible. We are really satisfied.
;
We received the manual in a timely manner and it was exactly what we were expecting. Excellent replacement for original Service Manual.
All schematics are very legible. We are really satisfied.
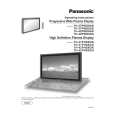
TH-37PWD8BK
7.18. Removal of stand brackets
1. Remove the plasma panel section from the servicing stand and lay on a table (covered), with the plasma panel surface facing downward. Spread a soft cloth for protection, to prevent panel surface from scratching. 2. Remove the stand bracket (left, right) fastening screws (�4 each) and remove the stand brackets (left, right).
7.19. Replacement of the plasma panel
1. Place the new plasma panel (finished) on the flat surface of the table (covered by a soft cloth), with the plasma panel surface facing downward. 2. Fit the stand brackets (left, right.) fasten 4 screws each on the new plasma panel. 3. Place the plasma panel section on the servicing stand. 4. Attach the front frame, each P.C.Board and so on, to the new plasma panel. * When fitting the front frame, be careful not to allow any debris, dust or handling residues to remain between the front glass and plasma panel.
16
|