|
There are currently no product reviews.
 ;
Great service. The manual was exactly what I was looking for: schematic + layout. I managed to fix the player. Highly recommended!
 ;
At $5,00 certainly good bang for your buck. Includes electric schematics as well as exploded parts view + parts list for reordering. Unfortunately no details on the PCB contents or working, but then again, this is not overly complex. Best bonus: this manual does contain the heavily searched for LED error codes as well as descriptions for test operation. Haven't gotten around to fixing the machine yet, one thing the manual won't do for you is getting it out of the kitchen assembly :-(
;
It`s not your fault tear down is rather incomplete. It doesn`t have complete instructions as to deconstruction for repair.
;
THANK YOU FOR A GOOD TRANSACTION, NICE COPY, CLEAR
;
Very Good! All the diagram are easy to read, and its complete.
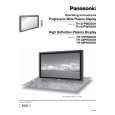
TH-37PWD8BK
7.18. Removal of stand brackets
1. Remove the plasma panel section from the servicing stand and lay on a table (covered), with the plasma panel surface facing downward. Spread a soft cloth for protection, to prevent panel surface from scratching. 2. Remove the stand bracket (left, right) fastening screws (�4 each) and remove the stand brackets (left, right).
7.19. Replacement of the plasma panel
1. Place the new plasma panel (finished) on the flat surface of the table (covered by a soft cloth), with the plasma panel surface facing downward. 2. Fit the stand brackets (left, right.) fasten 4 screws each on the new plasma panel. 3. Place the plasma panel section on the servicing stand. 4. Attach the front frame, each P.C.Board and so on, to the new plasma panel. * When fitting the front frame, be careful not to allow any debris, dust or handling residues to remain between the front glass and plasma panel.
16
|