|
There are currently no product reviews.
 ;
I found this service manual to be complete in every detail except for troubleshooting charts. It would be helpful if it had a set of troubleshooting charts; however it is a very good manual otherwise and for the price it is very well worth it.
 ;
Complete manual included schematics layouts and alignment procedure, clear to read and magnify, extremely pleased with manual and owner manual . com's service
;
perfect, i am very satisfait for the réception of the sansui r-5l service manual, thank you very much
;
Thank you, this is a rare document. Few others have it, but they charge way more for a download.
Great deal (even if you have to wait a few hours to get it).
;
The purchased manual is an high quality scan of the original Philips paper-based Service Manual. I am very satisfied!
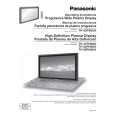
TH-37PH9UK / TH-42PH9UK
9. Disconnect the couplers(P2, P9, P11, P12, P23, P25). 10. Remove the 6 screws ( ) and then remove the P-Board. 11. Remove the each 1 screw ( ) and then remove the Speaker Terminal Black(L, R).
18. Disconnect the couplers(SS23, SS34). 19. Remove the Flexible Cable from the couplers(SS41, SS42, SS43, SS44) 20. Remove the 6 screws and then remove the SS-Board.
12. Disconnect the coupler(D20). 13. Remove the Flexible Cable from the couplers(D31, D32). 14. Remove the 4 screws and then remove the D-Board.
21. Remove the Flexible Cable from the coupler(C12). 22. Remove the 8 screws ( ) and then remove the Flexible Cable from the couplers(CB1, CB2, CB3, CB4). 23. Remove the 4 screws ( ) and then remove the C1-Board.
15. Remove the SU-Board and the SD-Board. (Reference to Removal of the SU-Board and the SD-Board) 16. Remove the 1 screw ( ) and then remove the clamper. 17. Remove the 6 screws ( ) and then remove the SC-Board.
24. Remove the 8 screws ( ) and then remove the Flexible Cable from the couplers(CB5, CB6, CB7, CB8). 25. Remove the 4 screws ( ) and then remove the C2-Board.
27
|