|
|
|
Categories
|
|
Information
|
|
Featured Product
|
|
|
 |
|
|
There are currently no product reviews.
 ;
Fully functional usable service manual. Considering the age of the manual and device quality was better than expected
 ;
Thank you very much, I've been very happy to find this manual on "Owner Manual". It's a perfect copy and it has been really useful for my work!
;
It took about 24-hours after my payment before I was able to get to the download. Apparently, payment processing is not 100% automated. That is no big deal, just be aware of that going in.
After I got to it, it was in good shape, easy to read, etc. Not some cheap FAX copy looking thing.
Also, this site was the cheapest I found. Another Plus!
;
Good price, very legible manual, exactly what I needed -- but had to wait a day to actually get the download of the manual. Would have preferred to download it immediately after payment rather than waiting for someone to "process" my order. I was surprised that I had to wait that long.
;
As the only source for this manual it rather rank quite high since it is well scanned and perfectly readable.
TH-A30R
<DVD mechanism assembly section>
Removing the DVD loader board (See Fig.1 to 3)
Prior to performing the following procedure, remove the top cover and DVD mechanism assembly. 1. Disconnect the card wire from the connector J6 on the DVD MPEG board. 2. Disconnect the harness from the connector on the motor board. 3. Disconnect the harness from the connector MJ5 on the DVD loader board. 4. Remove the four screws A attaching the DVD loader board to DVD mechanism assembly.
DVD loader board DVD MPEG board J6
DVD mechanism assembly (top side)
Fig.1
DVD mechanism assembly (bottom side) Motor board
A
CAUTION!!
(see fig.3)
Before removing the card wire which connects the pickup board and DVD loader board, solder the two soldering parts and make it short-circuit. Moreover, while having removed the card wire, don't remove these solder. 5. Disconnect the card wire from the connector RCN1 on the DVD loader board. ONE POINT How to eject the DVD tray manually (see fig.2) The white lever of the mark is moved in the direction of the arrow. Then, the tray will be opened. Moreover, the tray is separable from a DVD mechanism assembly by removing two screws of the mark (see fig.1) and drawing out the tray.
RCN1 MJ5
Connector
Fig.2
Pick up board
Soldering parts
Motor board
DVD loading mechanism
Fig.3
Removing the DVD loading mechanism (See Fig.4)
Prior to performing the following procedure, remove the top cover, DVD mechanism assembly and DVD loader board. 1. Remove the two screws B and remove the bracket. 2. Remove the one screw C fixing the DVD loading mechanism. 3. Move the lever in the direction of the arrow X. 4. Remove the DVD loading mechanism from the DVD mechanism assembly by moving it in the direction of the arrow Y.
B X
DVD mechanism assembly (bottom side) Bracket
Lever DVD loading mechanism
Y C
Fig.4
1-10
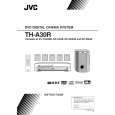 $4.99 TH-A30R JVC
Owner's Manual Complete owner's manual in digital format. The manual will be available for download as PDF file aft…
|
|
|
> |
|