|
|
|
Categories
|
|
Information
|
|
Featured Product
|
|
|
 |
|
|
There are currently no product reviews.
 ;
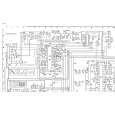
A great copy of the manual, and the only one I could find anywhere on the net! The circuit diagrams are easily readable, all component values marked and easy to see. A highly appreciated download!
 ;
Great Manual. This manual is available no where else. It was exactly what I was looking for.
;
The TEAC A-1500's Service Manual was instrumental in reviving this classic reel-to-reel. Not only does it have the schematics, exploded parts diagram and parts list, it also provided mechanical adjustment information that approximate factory default settings.
;
This service manual was determinant to enable to fix my Alpine Amplifier. I am pleased with my purchase. For a 5 star rating I would like to see a higher resolution scan of the printed circuit board lay-out because the gray scale grafics was dificult to see. Also some schematic diagrams were scanned at a slight angle. Never the less, it had all information I needed to troubleshoot and service my equipment.
;
Complete manual, the good quality of reproduction allows enlarged print-out of the schematic diagram in the size it probably had in the original print edition and which is necessary for practical use.
PAGE 1
1-1. H POS Horizontal Positioning Adjustment PAL Adjustment Menu No. 14 (Page 1-1) Input signal : Crosshatch Measuring instrument : Pattern generator / PAL � Use the volume keys on the jig remote controller to adjust the dot mark in the centre of crosshatch screen to the exact centering position by allocating an equal number of squares on the left and right side of the dot. A=B (Fig. 1-1) NTSC Adjustment Menu No. 87 Input signal : Crosshatch Measuring instrument : Pattern generator / NTSC � Using the �CHANNEL� key, scroll through the adjustment menu and select No.87. To adjust, follow the same procedure as PAL.
1-2. V POS Vertical Positioning Adjustment PAL Adjustment Menu No.15 (Page 1-2) Input signal : Crosshatch Measuring instrument : Pattern generator / PAL � Using the volume keys on the jig remote controller, adjust the dot mark to the exact vertical centre position in the crosshatch screen. (Fig. 1-2) * In case of being unable to adjust by the above mentioned procedure, adjust S501. NTSC Adjustment Menu No. 86 Input signal : Crosshatch Measuring instrument : Pattern generator / NTSC � Use the �CHANNEL� key to scroll through the adjustment menu and select No. 86. To adjust, follow the same procedure as PAL. * Do not adjust S501 for NTSC.
1-3. OSD H OSD Horizontal Positioning Adjustment PAL Adjustment Menu No. 16 (Page 1-4) Input signal : Crosshatch Measuring instrument : Pattern generator / PAL � Use the volume keys on the jig remote controller to adjust each A and B positions on both left and right in the equal distance towards the screen edge in the OSD display. A = B (Fig. 1-3) NTSC Adjustment Menu No. 88 Input signal : Crosshatch Measuring instrument : Pattern generator / NTSC � Use the �CHANNEL� key to scroll through the adjustment menu and select No.88. To adjust, follow the same procedure as PAL.
-53-
|
|
|
> |
|