|
|
|
Categories
|
|
Information
|
|
Featured Product
|
|
|
 |
|
|
There are currently no product reviews.
 ;
perfecto manual ,completo y detallado de muy buena calidad de impresion, ideal en una palabra.
;
un manual completo con una calidad de imagen buena con explicaciones en varios idiomas de los ajustes y detalles en conjunto un OK.
;
Good copy, clear and has all necessary information. Very happy with the purchase
 ;
buen manual con sus formas de onda y esquemas , completo y de buena calidad de imagen, es correcto.
;
This is exactly what I needed This was a hard one to find and I had already downloaded several for other Panasonic radios but none matched my radio.
Although my radio is the LBE model the LBS is the same.
A very good quality manual with every thing you should get in it
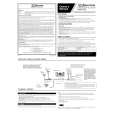
TX-SR803/E ADJUSTMENT AND CONFIRMATION PROCEDURES 1
Idling current adjustment Before Idling current adjustment, turn the trimming resistors R6040 to R6046 to counter-clockwise. Connect the DC voltmeter at the sockets P6080 to P6086 via the carbon resistors 100 ohm 1/4W.
DC voltmeter 100 ohm 1/4watts Jig terminal Test point ID+ ID-
After turn POWER to ON, adjust the trimming resistors R6040, R6041 and R6042 so that the reading of voltmeter becomes 2.5 mV. (Front and center channels) Adjust the trimming resistors R6043, R6044, R6045 and R6046 so that the reading of voltmeter becomes 1.5 mV. (Surround and surround back channels) After adjustment, attach the top cover. Confirm the voltage of points above after about five minutes. Front and center channels When less than 9.0 mV, readjust the resistors above so that the voltage becomes 9.0 mV. When 9.0 mV to 11.0 mV, you are not necessary to adjust. When more than 11.0 mV, readjust the resistors above so that the voltage becomes 11.0 mV. Surround and surround back channels When less than 6.0 mV, readjust the resistors above so that the voltage becomes 6.0 mV. When 6.0 mV to 8.0 mV, you are not necessary to adjust. When more than 6.0 mV, readjust the resistors above so that the voltage becomes 8.0 mV. Note: No load and No signal
JL6600A P6000A R6040 JL6603A R6041
P6952A
U06
NAAF-8678 P5004B
R6043
P3105A
P3104A
P3103A
P6001A
P6002A
P6004A P6084
R6044
P6005A P6085
P6080
NAAF-8682 JL6200B
Confirmation of protection circuit 1. Confirmation of operation of speaker relay Confirm that the speaker relays turn ON approximate 5 seconds after the power switch is turned ON. Confirm that the speaker relays turn OFF immediately after the power switch is turned OFF. 2. Confirmation of DC detection circuit Press and hold down CD button, then press STANDBY/ON button to set the unit to "Test- 1". After "Test- 1" on the FL tube light on, press DVD button to set the unit to "Test- 1-00". Apply DC 1.5 to 3.5V to the MULTI-CH INPUT terminal with no load. Confirm that the speaker relay turns OFF. Apply DC -1.5 to -3.5 V to the MULTI-CH INPUT terminal with no load. Confirm that the speaker relay turns OFF. Caution: Don't apply DC voltage more than 1 sec..
P3102A P3101A JL6200A
P6086 JL6006B
Surround back amplifier
P6081
P6082
R6042
R6046
U064
P6083 P6003A
R6045
|
|
|
> |
|