|
|
|
Categories
|
|
Information
|
|
Featured Product
|
|
|
 |
|
|
There are currently no product reviews.
 ;
Fast service, document is OK. Thanks! Searched for it long time.
 ;
I was very pleased with the manual I got for my amateur (ham) radio. Without it I could not figure out how to input and/or change the P/L setting on my radio. It drove me nuts as the radio was essentially useless. That all changed when my manual came. Then it took only minutes and I was done. Now my radio works fine. This is an exceptionally good resource as it's a very easy and user friendly download. Thank you very much! Dziękujemy za!
;
It answered my question, which was how to load the paper. I did notice that the very end of the manual was not visible.
;
The product manual I received was exactly what I was looking for, delivered painlessly at a very fair price. I can't ask for any more than that.
;
Very well done!!!!! congratulations. It was a bit longer than usual the wiating time even if it was on time (in 24 hours).
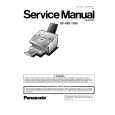
Troubleshooting
Replacing the Lithium Battery
During the initial self test, when the power is turned �On�, the machine will evaluate the condition of the back up battery. If the battery is weak or fully discharged, the following message will be shown on the display.
REPLACE BATTERY INFO. CODE=026
To replace the battery, follow the procedure below:
1
(1) Remove the Battery Holder. (If the Battery Holder does not come out easily, open the Printer Cover and try again.)
Dispose of the Lithium Battery properly and keep it away from small children.
!
CAUTION
8
2
(1) Remove the Battery from the Battery Holder. (2) Install the new Battery into the Battery Holder with the � side facing upwards. (Order No.: CR2032)
!
CAUTION
When replacing the battery make sure to observe the polarity to avoid damage to the machine.
3
(1) Re-install the Battery Holder.
4
If the clock is flashing on the LCD Display, follow the procedure on page 26 to reset the clock.
(see Note 1)
Note: 1. The service life of the battery is approximately 1 year when the machine is turned �Off�.
149
|
|
|
> |
|