|
|
|
Categories
|
|
Information
|
|
Featured Product
|
|
|
 |
|
|
There are currently no product reviews.
 ;
Speedy transaction with a quick download. Awesome hassle-free service.
;
very poolite and healpful secure transaction thanks allot
;
- Very good scan quality, PERFECT!
- Sehr gute scan Qualitaet, empfehlenswert!
Wolfgang Sundhaus
 ;
Good site, works ok and you get what you order, no problems experienced, got my manual within a day. A++++
;
Original well scanned manual. Got the job done. Microwave problem found & corrected. For $5 and a new magnitron from ebay, it was a cheap and good the first shot fix. Electrical schematics allowed me to mage sure every thing else was ok before cutting and order for parts. Hard to live without.
Wiring Diagram page 5 /8
#299 1) Insert the RED tape side of "ECN" in the T-com board. 2) �ECN" must pass on �ELCD3�. *Refer to photo 1 (page3/4) Do the styling so that the wire After dressing �EPS" and �ELCD3�, stick the tape (#299 Nitto tape) on them. Refer to the Final Assy Guide Page 5/9. should not pass the upper part of ELCD3 EPS the shielding case.
D8MW
Do the styling so that the binding tape of �ELCD3� should not pass over the
frame. (Prevent it from touching with the back-cover.)
#299
#SKUL
#SKUL
Insert it surely.
#SKUL ELCD ELCD2
#361
ECN EPS
UT32S402 UT32S602, UT32V502, UT32V502W, UT32X812, ONLY.
12pin
#360 EFF
Detail-1(page2/4) Photo2(page3/4)
ELS NSPK
EISP
NSP EKL EISP EPU #NSP
EISP NEL E001
E002
The wire of �EKL" must go in between the KEY_SW
Photo 4 (page3/4)
IR/POW SW board
Detail-2
(page2/4)
board and the case, the surplus is hold in between. (It is to prevent the electric wire being pinched when tightening up a screw.) *Refer to photo3(page3/4)
Fix with SK binder(#NSPK) so that the wire of �EISP" should not touch the filter board. *Refer to photo5 (page 4/4)
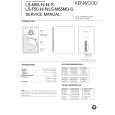
TABLE OF CONTENTS
40
|
|
|
> |
|