|
|
|
Categories
|
|
Information
|
|
Featured Product
|
|
|
 |
|
|
There are currently no product reviews.
 ;
Excellent printing quality.
A complete and very usefull service manual with all details.
GREAT SERVICE AT VERY LOW PRICE!
A++
 ;
Best help everywhere i got from here. My audio medicinman was happy to get this manual from me. So he could repair my pioneer perfectly. Thanks
R O
 ;
It was very usefull, it is clear the quality is super, the price I paid is very afordable.
Generally speaking Iam very happy with this company.
 ;
The manual was exactly what I needed, Good quality scans too. superb.
 ;
I am so happy found this site as it consists of so many Manuls and easy to aquire. This onei s exactly what I wanted and much more as it has info on not only how to use the tuner but how to repair it as well. I will come here 1st before purchasing else where! Thanks owner-manual.com!
3.1.9 Removing the heat sink/power board (See Fig.20 to 27) � Prior to performing the following procedure, remove the front panel assembly. (1) From the bottom of the rear cover, peel off the tape attaching the wire extending from the power board and remove the earth plate which is attached with the double-sided tape. (2) Remove the four screws T attaching the holder in the power unit section. (3) Move the power unit section with the wire from the rear cover temporarily. If necessary, release the band and unsolder the wire on the power board. (4) Remove the four screws U and the screw Y attaching the holder. (5) Release the wire from the band at �e� and move the holder in the direction of the arrow to release from the joint f. (6) Remove the four screws A� and two screws B� attaching the heat sink. (7) Remove the two screws D� attaching the power board.
Power unit section
T
T
T
T
Power unit section
Rear cover Power trnsfomer assembly
Fig.21
Wire
Rear cover Tape
Fig.20
earth plate
Rear cover Ppwer unit section
Fig.22
(No.MB297)1-15
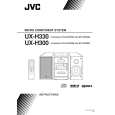
 $4.99 UX-H300 JVC
Owner's Manual Complete owner's manual in digital format. The manual will be available for download as PDF file aft…  $4.99 UX-H300 JVC
Parts Catalog Parts Catalog only. It's available in PDF format. Useful, if Your equipment is broken and You need t…
|
|
 |
> |
|
