|
There are currently no product reviews.
 ;
It was a great experience,instead of purchasing a new Stereo Amplifier ,in just minutes i repaired my old one and that was thaks to the manual I have purchased from you.
Thanks again.
Samuel Alter
;
Das ging ja sehr unkompliziert hat bestens geklappt und die Quallität ist auch noch gut.
Vielen Dank dafür.
;
Everything okay, thanks a lot. It was a pleasure for me to make a deal with you.
;
A deal without problems, very fast and the manual is a good quality. Sorry for the my english.
;
Superb service and excellent quality of the document received
UX-P710DE
5. Imaging Film
5.1. Checking the pre-loaded sample roll
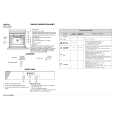
A sample roll of imaging film has been pre-loaded in the machine. Perform steps 1 to 2 and 5 to 7 of Replacing the imaging film below to check the film and make sure it is taut. � The sample roll of imaging film can print about 20 pages. If [FILM END] appears If [FILM END] appears in the display for longer than 10 seconds, open the machine (see Steps 1 and 2 of Replacing the imaging film below) and check the film. If the film has completely wound onto the front spool, replace the film. Otherwise, perform Steps 5 to 7 of Replacing the imaging film to remove slack. 3) Remove the used roll from the compartment, lifting the left ends of the spools first.
5.2. Replacing the imaging film
Replacement film When replacing the imaging film, use the following imaging film: SHARP UX-31CR (one roll) or SHARP UX-32CR (two rolls) Follow the steps below to replace the imaging film. Note: Before replacing the imaging film, remove any paper from the paper tray and push in the tray extension. 1) Open the operation panel. 4) Insert the new roll of film into the print compartment: a. Fit the right ends of the spools onto the pins.
2) Pull the release and open the print compartment cover. b. Place the left ends so that the shafts of the gears fit into the holders.
Pull green release
1�6
|