|
|
|
Categories
|
|
Information
|
|
Featured Product
|
|
|
 |
|
|
There are currently no product reviews.
 ;
Genuine Service Manual. Link was available in less then an hour or so. Service Manual contains assembly, PCB layout, complete circuit diagram, Components list etc
;
Great and very well scanned Service Manual, also very fast download - Recomended !
;
I'm quite impressed. I had to wait 24 hours for my manual (quite a rare one) but I got it and the quality was good. Also, from trawling the web, these prices are by far the best.
;
Manuale perfetto. Ottimo e utilissimo. Grazie a questo manuale ho potuto realmente risolvere il complesso problema della stampante.
;
Manuale perfetto. Ottimo e utilissimo. Grazie a questo manuale ho potuto realmente risolvere il complesso problema della stampante.
VL-PD3AS/AH/AE
3. DISASSEMBLY OF THE SET
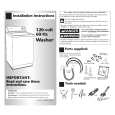
Note: Before removing the cabinet, turn off the power supply, and ascertain that the battery have been removed. 1. 5.
V/F section
(D) (D) (D) (C) (D)
(G)
· Remove the screws ((D)XiPSF17P03000)(4pcs.) of the bottom · Up the section of V/F, and remove the screw ((D)XiPSF17P03000) cover and them. (1pc.). · Remove the screws ((D)XiPSF17P03000)(2pcs.) and ((C) 2. XiPSF1704000)(1pc.). · Remove the screw ((G)XiPSN17P03000)(1pc.) and battery cover.
(F)
6.
(F)
(D)
(B) (F) (R)
· Remove the screws ((F)XiPSN17P04000)(3pcs.), ((B)LXHZ0050TAFN)(1pc.) of the front cover and the DV terminal's screw ((R)XiPSN16P05000)(1pc.).
3.
Remove the claw
(D)
(D)
(D)
· Remove the screw ((D)XiPSF17P03000)(1pc.) of topside and open the cassette compartment door, remove the screws ((D)XiPSF17P03000) (3pcs.) of both sides and center screws. Remove the Remote control receiver unit connector, the Zoom FPC, the EJECT switch connector, the H/A connector, and the cabinet A.
(B)
7.
(D)
· Open the LCD panel, remove the screws ((B)LX-HZ0050TAFN) (2pcs.), the claws what is connected the cabinet A and remove the front cover. Be careful so that not damage the lead wires of microphone when it removes the front cover.
(H)
4.
(G) (G)
· Remove the screw ((D)XiPSF17P03000)(1pc.) topside of cabinet B and the screws ((H)XiPSN17P02000)(1pc.) of side surface and ((G) XiPSN17P03000)(1pc.) of rear surface.
Microphone connector
(Note.) In case of disassemble or assemble the section of V/F, do the work with great care that there are never taint or intermix of dust.
· Slide the section of V/F, and remove the plate of topside, the screws ((G)XiPSN17P03000)(2pcs.), and remove the top cover what is slided toward V/F slide.
4
|
|
|
> |
|