|
There are currently no product reviews.
 ;
Excellent manual, very clear, technical specification provided, useful information regarding adjustment and set up.
 ;
fast and easy and exactly what I was looking for. Not the cheapest but value for money after all.
;
The manual for the Sansui P-L75 was not one of the more informative turntable manuals around but for $5 it was helpful enough.
;
VERY GOOD SERVICE.FAST ANS VERY HONEST PRICE .RHAANK HERNAN
;
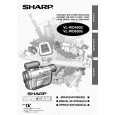
Thanks to this service manual I repaired my old camcorder! The manual perfectly explains how to disassemble the camcorder step by step.
VL-WD250S/H/E VL-WD450S/H/E 6. 9.
(c) (c)
(a)
1) Remove the screw ((a)LX-BZ0221TAFC)(1 pc.) to remove the cassette lid.
10.
(d)
1) Disconnect the B TO B connector of the DV main FPC, disconnect the front and rear FPC connectors, and remove the screws ((c)XiPSF17P04000)(2 pcs.) to remove the main PWB.
7.
(b) (b)
(d) (c)
(b)
(b)
1) Remove the screws ((b)LX-HZ0063TAFF)(2 pcs.) to remove the speaker cover. 2) Disconnect the connector of the speaker to remove the speaker. 3) Remove the screws ((d)XiPSN17P04000)(2 pcs.) and the screw ((c)XiPSF17P04000)(1 pc.), and remove the DV terminal PWB together with the stay front ass'y.
11.
(l)
(l)
1) Remove the screws ((b)LX-HZ0063TAFF)(5 pcs.), and remove the mechanism together with the mechanism PWB fitting angle.
8.
(b)
1) Remove the screws ((l)LX-HZ0017TAFF)(2 pcs.) to remove the LCD ass'y.
12.
(`)
(d) (c)
(d) (c)
(`)
(d)
1) Remove the screws ((b)LX-HZ0063TAFF)(3 pcs.) to remove the zoom switch unit and AV terminal.
1) The shaft (` section) of the LCD tilt unit is rotated in the arrow direction 90°. 2) Turn the LCD tilt unit so as to verticalize it to the LCD cabinet. 3) Remove the fixing screws ((c)XiPSF17P04000)(2 pcs.) and ((d)XiPSN17P04000)(3 pcs.).
5
|