|
|
|
Categories
|
|
Information
|
|
Featured Product
|
|
|
 |
|
|
There are currently no product reviews.
 ;
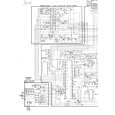
This is a high quality manual with clear schematic and components layout diagrams ; with service procedure included.
 ;
This service manual for the Kenwood KT-990D was reproduced really well ,is very legible and manual is complete.Combined with the low price paid,in the future,I will be checking Owner-Manuals.com any time I need a manual.
;
When I purchased this manual I had my doubts regarding the quality as the price was so reasonable as compared to other outlets.
The manual itself is of high standard the print is very clear as are the diagrams. Obviously with the diagrams one has to zoom in otherwise it is to small to be able to read.
Overall I am very pleased with the company who delivered as they said and with the manual they supplied.
I occasionally require a manual and now having registered with this company I shall order from them in the future.
;
I was at first dubious about payiong for downloaded manuals but having done so, I was extremely impressed with quality of the two manual I ordered, well worth the small price I paid.
I would highly recommend these to my friends.
;
reasonable price for the schematic - the service is perfect, all as expected and pointed by instructions - good scan of the original plans - thank you!
VSX-29TX, VSX-27TX, VSX-26TX, VSX-24TX, VSX-D908S
Basic Receiver LCD Screens
Receiver MAIN Screen
1 0 9
Receiver
DSP MAIN STEREO EFFECT SUB
8 MIDNIGHT button 2
Switches the MIDNIGHT LISTENING mode on or off.
9 DSP button
Press repeatedly to select a DSP sound mode.
0 STEREO button
Press to select the STEREO sound mode. In this mode, sound comes from the front (left and right) speakers only.
/ dts
THX ADVANCED STANDARD THEATER DIRECT LOUDNESS MIDNIGHT DIGITAL NR
8
SIGNAL SELECT
3 4
Receiver SUB Screen
1
Receiver
MAIN SUB
2
7 65 1 Receiver MAIN button
Press this button to select the main receiver screen (above) when the remote control is on the sub receiver screen.
7 6 5
TAPE 2 EXTERNAL MONITOR 5.1CH BASS INPUT ATT. TREBLE
2 EFFECT +/- button
Use these buttons to increase or decrease the amount of effect applied in a DSP or Advanced Theater mode. When the amount of effect is increased in a DSP/ Advanced Theater mode the characteristics of that mode become stronger and more noticeable. The scale ranges from 10-90 with 70 as the default setting. First turn on the DSP/Advanced Theater mode you want (by pressing the DSP/Advanced Theater button until you get the mode) and then increase or decrease the amount of effect.
CH LEVEL SYSTEM SETUP
4 1 Receiver SUB button
3
Press this button to select the sub receiver screen (above) when the remote control is on the main receiver screen.
2 BASS & TREBLE (+/�) buttons
Use to adjust the high and low frequencies (STEREO mode only).
3
/dts buttons
Press these buttons to put the receiver in the selected surround sound mode. For more information on the modes
3 SYSTEM SET UP button
Use to set up the speaker and sound systems.
4 SIGNAL SELECT button
Press SIGNAL SELECT repeatedly to select one of the following: ANALOG : To select an analog signal. DIGITAL : To select a digital signal (DVD/LD, TV/SAT, CD, MD/TAPE 1, VCR 1, VCR 2). AC-3 RF : To select an AC-3 RF signal (DVD/LD, TV/ SAT, VCR 1, VCR 2). AUTO : This is the default. If there are both analog and digital input signal, the receiver automatically selects digital.
4 CHANNEL LEVEL button
Use this feature to adjust the level of individual speakers during playback of a source.
5 INPUT ATT button
Use to lower the input level of an analog signal that is too powerful, thus causing the receiver to distort (the overload indicator will light furiously).
6 EXTERNAL 5.1 CHANNEL button
Use to hook up an external component that can decode other types of signals and input them into the VSX-29TX.
5 DIRECT button
Switches DIRECT playback on or off. Use to bypass the tone controls and channel level for the most accurate reproduction of a program source. It will automatically put the receiver in STEREO mode for the function being used for DIRECT playback.
7 TAPE 2 MONITOR button
Selects the tape deck (or MD recorder, etc.) connected to the TAPE 2 MONITOR inputs/outputs. Allows monitoring of a recording as it's being made.
6 LOUDNESS button
Switches the LOUDNESS mode on or off.
7 DIGITAL NR button
Switches the DIGITAL NR on or off (STEREO mode only).
108
|
|
|
> |
|