|
|
|
Categories
|
|
Information
|
|
Featured Product
|
|
|
 |
|
|
There are currently no product reviews.
 ;
Acurate informations inside the SM and I could repair my old Sansui SC-3330 without any problems. Thanks.
;
I used it to repair a NAD 7030, but unfortunately, the 7045 is different !
But documentation was useful.
;
Content A4 and A3 format pages. Exactly what I needed to restore my old receiver.
;
Content A4 and A3 format pages. Exactly what I needed to restore my old receiver.
;
Thanks you very much for this "hard to find" service manual.
Will help a lot in repairing this receiver.
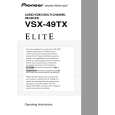
VSX-49TX, VSX-47TX
13 TONE control buttons TONE button
This button switches between TONE ON and TONE BYPASS, which bypasses the tone circuitry.
2 RF � To select an 2 RF signal. AUTO � This is the default setting. If there are analog, digital and 2 RF signals input, the receiver automatically selects the 2 RF signal. If there are analog and digital signals input the digital will be selected.
BASS/TREBLE button
Use to select whether the bass or treble will be adjusted..
21 VIDEO SELECT button
Switches the receiver between the various types of video input.
(�/+) buttons
Use to adjust the frequencies.
14 DIGITAL NR button
Switches the DIGITAL NR on or off (cannot be used in THX).
22 TAPE 2 MONITOR button
Selects the tape deck (MD recorder, etc.) connected to the TAPE 2 MONITOR inputs/ outputs. Allows monitoring of a recording as it's being made.
15 TUNER CONTROL buttons
CLASS button � Press repeatedly to switch the preset station classes. �/+ button � Use to choose programmed radio stations.
23 MULTI CH INPUT button
Use when you have hooked up an external component that can decode other types of signals and input them into the VSX-49TX.
16 LISTENING CH SELECT button
Use this button to select the number of channels used for playback (5.1, 7 or AUTO). .1,
24 SETUP MIC jack
Plug in the setup mic here. This is very important for setting up your system to get proper surround sound.
17 MULTI-ROOM & SOURCE buttons
Press to use the multi room feature (requires an optional PIONEER Multi-Room Remote Sensor Unit MR-100 or another IR receiver). CONTROL button: Used together with the INPUT SELECTOR to select the function or use with the MASTER VOLUME to select the volume of the MULTI ROOM system. ON/OFF button: Use to switch Multi-room function on or off.
25 Front VIDEO INPUT jacks
DIGITAL IN : digital input for connecting a game console, portable DVD player, video camera (etc.), that has an optical digital connection. S VIDEO : Video input for connecting a video camera (etc.), that has an S video out. RCA VIDEO / AUDIO (L/R) : Video input for connecting a video camera, etc. that has standard RCA video/audio outputs.
18 PHONES jack
Connect headphones for private listening (no sound will be heard through the speakers).
19 SP SYSTEM A/B button
Use to select the speaker system. A is the primary setting. The button cycles through the speaker systems as follows: A]B]A&B]off. Different conditions apply when bi-amping the speakers. For this case refer to page 71.
20 SIGNAL SELECT button
Use to select the type of signal being input into the receiver. Press SIGNAL SELECT repeatedly to select one of the following: ANALOG � To select an analog signal. DIGITAL � To select an optical or coaxial digital signal.
172
|
|
|
> |
|