|
|
|
Categories
|
|
Information
|
|
Featured Product
|
|
|
 |
|
|
There are currently no product reviews.
 ;
The manual is excellent, well detailed, and divided into two parts. Received very quickly. Thank you.
;
a solid deal - quick and without any problems.
I life in europe - with downloads no loosing time
once again
 ;
got exactly what i ordered in a very timely manner. will use again for other manuals
;
I'm happy. Good quality. Very helped me with my work..............................
;
This is the second Manual I have ordered from owner-manuals, I give it five stars because it is exactly what I expected given the age of the equipment. So the contents look a bit aged and the pictures a bit grainy, it fulfills my needs and I am glad I can still get hold of them.
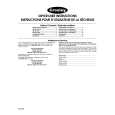
PREPARATION FOR SERVICING
How to use the Servicing Fixture 1. Unplug the connector CP301, CP353, CP810, CP820, CP850 and CP005, then remove the VCR Block from the set. 2. Connect as shown in the below figure using the Service Fixture. � Connect the Syscon PCB to the Main PCB with the cable JG162A and JG162H. � Connect the Syscon PCB to the CRT PCB with the cable JG162Y. 3. Short circuit between TP1001 and Ground with the cable JG154. (Refer to MAJOR COMPONENTS LOCATION GUIDE) The EOT, BOT and Reel Sensor do not work at this moment. 4. At that time, the STOP/EJECT button is available to insert and eject the Cassette Tape.
Head Amp PCB JG162A CP810
IF PCB Deck Chassis
Operation 1 PCB JG162H To Main PCB (CD810) CP850 To Main PCB (CD820) JG162Y CP820 TP1001 Syscon PCB
To CRT PCB (CD850)
JG154 To Ground
C5-2
|
|
|
> |
|