|
|
|
Categories
|
|
Information
|
|
Featured Product
|
|
|
 |
|
|
There are currently no product reviews.
 ;
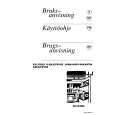
It`s full copy of a service manual from url http://www.philips.owner-manuals.com/PM3216-service-manual-PHILIPS.html
 ;
perfect! you just sent to me the copy in Italian witout even my specification!!!! so you are really smart cooperative and efficient. To my opinion the best place all over to get a manual of electronics!!!!
;
Well Well Well!!!! Good manual perfect for my hobby!!! As Before you have done a very well done work!!!! Thank you
;
Super nice! Good to have a manual in digital format.
;
Great job supplying the manual.
Many of these products weerepretty obscure, so it was great that you had
the manual for it!
7. Reassemble the inner and outer door assemblies with the 6 screws.
Complete Installation
1. Check that all parts are now installed. If there is an extra part, go back through the steps to see which step was skipped. 2. Check that you have all of your tools. 3. Dispose of/recycle all packaging materials. 4. Check the dryer�s final location. Be sure the vent is not crushed or kinked. 5. Check that the dryer is level. See �Level Dryer.� 6. For power supply cord installation, plug into an outlet. For direct wire installation, reconnect power. 7. Remove the blue protective film on the console and any tape remaining on the dryer. 8. Read �Dryer Use.� 9. Wipe the dryer drum interior thoroughly with a damp cloth to remove any dust. 10. Select a Timed Dry heated cycle, and start the dryer. Do not select the Air Only modifier. If the dryer will not start, check the following:
â� â� â� â� â�
Reverse the strike 1. Use a small flat-blade screwdriver to remove plug strip from the dryer door opening. Slide the head of the screwdriver under the plugs, being certain not to scratch the dryer surface. Lift up. 2. Remove the strike. 3. Insert strike and plug strip on the opposite side.
Controls are set in a running or �On� position. Start button has been pushed firmly. Dryer is plugged into an outlet and/or electrical supply is connected. Household fuse is intact and tight, or circuit breaker has not tripped. Dryer door is closed.
B
11. When the dryer has been running for 5 minutes, open the dryer door and feel for heat. If you feel heat, cancel cycle and close the door. If you do not feel heat, turn off the dryer and check the following:
â�
A
A. Plug strip (cannot be seen from this angle) B. Door strike
There may be 2 household fuses or circuit breakers for the dryer. Check that both fuses are intact and tight, or that both circuit breakers have not tripped. If there is still no heat, contact a qualified technician.
Reinstall the door 1. Reattach door to dryer front panel with the 4 screws.
NOTE: You may notice a burning odor when the dryer is first heated. This odor is common when the heating element is first used. The odor will go away.
A
B
A. Dryer front panel B. Door assembly
2. Check for fingerprints on the glass. Clean the glass if necessary. 3. Close door and check that it latches securely.
17
|
|
|
> |
|