|
There are currently no product reviews.
 ;
This manual is very helpful, correct shematic diagram, and good exploded view.Perfect!
;
Alte gescannte Servicepläne sind oft doch etwas undeutlich . Stromlaufpläne werden auf mehrere DIN A4 Seiten aufgeteilt. Alles ziemlich umständlich und zeitaufwendig. Aber mit etwas Mühe geht alles.
 ;
Great item, high resolution, detailed, very easy to work with.
;
fast delevery of the manual and very complete manual, now my Akai works again, will buy again, thanks.
;
Tartalma megfelelő. Szebb kivitelű is lehetne a scannelés.
XL-R910SL
Disassembly method
<Main body> Removing the metal cover (See Fig.1)
1.Remove the three screws A attaching the metal cover on the back of the body. 2.Remove the four screws B attaching the metal cover on both sides of the body. 3.Remove the metal cover from the body by lifting the rear part of the cover. ATTENTION : Do not break the front panel tab fitted to the metal cover. Bx2 A Bx2 Fig. 1 A A Metal cover
Removing the front panel assembly (See Fig.2~5)
* Prior to performing the following procedure, remove the metal cover. 1.Remove the three screws C attaching the front panel assembly on the bottom of the body and both sides of the body. 2.Disconnect the card wire from connector CN601 on the servo control board. 3.Disconnect the 4pin wire from connector CN502 on the servo control board. 4.Disconnect the 3pin wire and 8pin wire from connector ACW1 and RCW2 on the main board. Please remove a tie band if necessary. Please fix the wire again with a tie band when assembling. 5.Release the two joints a on the lower part of the sides using a screwdriver, and remove the front panel assembly toward the front.
Front panel assembly
C
Fig. 2
Front panel assembly
joint a Fig. 3 C
RCW2 ACW1
F
RCW1 Main board
Front panel assembly
F
Tie band Mechanism assembly
G
NCW1 CN502 Tie band CN701 CN601
D
Joint a
C
Fig. 4
Fig. 5
1-3
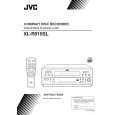 $4.99 XLR910SL JVC
Owner's Manual Complete owner's manual in digital format. The manual will be available for download as PDF file aft…
|










