|
|
|
Categories
|
|
Information
|
|
Featured Product
|
|
|
 |
|
|
There are currently no product reviews.
 ;
Excellent service manual, the only known point of note is the alignment of improvability scanned pages within the pdf page. The resolution is good.
 ;
I was very glad recieving the service manal from You. Additionaly very fast. Extremaly nice servicing. Thanks very mach! Now my GX-220 working better, than it was made. Alexander from Moscow, Russia/
 ;
Sweet! I won the item on eBay and couldn't adjust the geometry or even keep a steady picure. This guide has the full schematics (not available anywhere else as far as I could tell), and was a bargain for the wealth of knowledge it contains. I hooked it up to my testing equipment, tweaked a few potentiometers and got it playing videogames in no time. Thanks!
 ;
It was just what I need to fix my old BMW's CD player. Very convenient also. Thank you.
 ;
Great Manual! It contains all the wiring schematics and mechanical exploded views that are essential for service and repair. I was surprised I even found this for such an old machine. Only wish I knew of this site many years ago.
ADJUSTMENT <TUNER / DECK>
< TUNER SECTION >
1. Clock Frequency Check Settings : � Test point : TP2 (CLK) Method : Set to AM 1710 kHz and check that the test point is 2160 kHz ± 45 Hz. 2. AM VT Check Settings : � Test point : TP1 (VT) Method : Set to AM 1710 kHz and check that the test point is less than 8.5 V. Then set to AM 530 kHz and check that the test point is more than 0.6 V. 3. AM Tracking Adjustment Settings : � Test point : TP8 (Rch), TP9 (Lch) � Adjustment location : L951(1/3) Method : Set to AM 1000 kHz and adjust L951(1/3) so that the test point becomes maximum. 4. AM IF Adjustment Settings : � Test point : TP8 (Rch), TP9 (Lch) � Adjustment location : L802 L802 ................................................... 450 kHz 5. FM VT Adjustment Settings : � Test point : TP1 (VT) � Adjustment location : L907 Method : Set to FM 108.0 MHz and adjust the L907 so that the test point is 7.00 V ± 0.05 V. 6. FM VT Check Settings : � Test point : TP1 (VT) Method : Set to FM 87.5 MHz check that the test point is more than 0.5 V. 7. FM Tracking Adjustment Settings : � Test point : TP8 (Rch), TP9 (Lch) � Adjustment location: L904 Method : Set to FM 98.0 MHz and adjust L904 so that the test point becomes maximum and distortion to minmum. 8. FM Tracking Check Settings : � Test point : TP8 (Rch), TP9 (Lch) Method : Set to FM 98.0 MHz and check that the test point is less than 9 dBµV. 9. DC Balance / Mono Distortion Adjustment Settings : � Test point : TP3, TP4 (DC Balance) TP8 (LCH), TP9 (RCH) (Mono Distortion) � Adjustment location : L801 � Input level : 60 dBµV Method : Set to FM 98.0 MHz and adjust L801 so that the voltage between TP3 and TP4 becomes 0 V ± 500 mV with minimum distortion. 10. Output Level Check <AM> Settings : � Test point : TP8 (Rch), TP9 (Lch) � Input level : 74 dBµV Method : Set to AM1000 kHz and check that the test point is 55 mV ± 3 dB. <FM> Settings : � Test point : TP8 (Rch), TP9 (Lch) � Input level : 60 dBµV Method : Set to FM 98.0MHz and check that the test point is 270 mV ± 3 dB. 11. FM Separation Check Settings : � Test point : TP8 (Rch), TP9 (Lch) � Input level : 60 dBµV Method : Set to FM 98.0 MHz and check that the separation more than 25 dB.
< DECK SECTION >
1. Tape Speed Check Settings : � Test tape : Method : TTA�100
� Test point : SP OUT Play back the test tape and check the test point is 3000 Hz ± 5 Hz (FWD) and FWD speed ± 45 Hz (REV).
2. Head Azimuth Adjustment Settings : � Test tape : TTA�330 � Test point : SP OUT � Adjustment location : Head azimuth adjustment screw Method : Play back (FWD) the 8 kHz signal of the test tape and adjust screw so that the output becomes maximum. Next, perform on REV PLAY mode. 3. PB Frequency Response Check Settings : � Test tape : TTA�320 � Test point : SP OUT Method : Play back the 315 Hz and 10 kHz signals of the test tape and check that the output ratio of the 10 kHz signal with respect to that of the 315 Hz signal is -3 dB ± 3 dB. 4. REC/PB Frequency Response Check Settings : � Test tape : TTA�602 � Test point : SP OUT � Input signal : 8 kHz/1 kHz (-20 VU / 0dB) Method : Apply a 1 kHz signal and REC mode. Record and play back the 1 kHz signals and check that the output is -2 dB ± 3 dB.
� 31 �
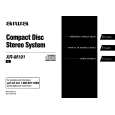
 $4.99 XRM191 AIWA
Owner's Manual Complete owner's manual in digital format. The manual will be available for download as PDF file aft…
|
|
 |
> |
|
