|
There are currently no product reviews.
 ;
y'm hapy for this shoping . Estoy feliz por esta compra , ahora puedo reparar mi equipo de audio que AMO . And very good price for this manual . Thank yuo .
;
Perfect manual, perfect service. Easy reading. Thanks a lot
;
Very good quality download here. Great hard to find manuals at a reasonable price.
 ;
I had a problem with the mains transformer, I did not know the voltages on the secondary, this manual helped me to solve this problem, thanks for the manual!
;
Great manual, great quality copy, complete parts reference and scematics, Thank you
9. Drive motor disassembly
1 Remove the document table. 2 Remove the top cabinet. 3 Remove the bottom cabinet and remove the drum cartridge. 4 Remove the motor encoder sensor PWB and the encoder. 5 Remove the main chassis and remove the drive unit. 6 Remove the drive motor. (2 screws)
11. Lower heat roller disassembly
1 Remove the document table. 2 Remove the top cabinet. 3 Remove the bottom cabinet and the drum cartridge. 4 Remove the main chassis. 5 Remove the lower heat roller.
12. Heater lamp disassembly
1 Remove the document table and the top cabinet.
10. Power PWB disassembly
1 Remove the document table. 2 Remove top cabinet. 3 Remove the bottom cabenit and the drum cartridge. 4 Remove the main chassis. 5 Disconnect the connectors and the grounding cable (1 screw). 6 Remove the three fixing screws and remove the power PWB.
2 Remove the screw which secures the heater lamp terminal in the
rear side, and remove the heater lamp terminal.
3 Pull out the heater lamp from the rear side.
Note: Do not touch the glass surface of the heater lamp directly with your hand.
@
Note for assembly: When assembling, put the rating indication (e.g., 100V 600W) of the heater lamp towards the front side.
� 20 �
 $4.99 Z-25 SHARP
Owner's Manual Complete owner's manual in digital format. The manual will be available for download as PDF file aft… 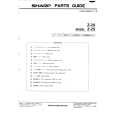 $4.99 Z-25 SHARP
Parts Catalog Parts Catalog only. It's available in PDF format. Useful, if Your equipment is broken and You need t…
|