Thanks so much for the Owner's manual for my Sony PS - FL1. I had purchased the turntable off of eBay. It came in and looked great. Packed well and appeared to be great. I balanced and aligned the tone are and hooked it up. When trying to play a record the tone are would move to the right place and just before it would drop to play it moved back off the edge of the record before touching down. I searched the net for an answer to this issue. No luck. Then I purchased the owners manual and sure enough there was a place to adjust where the stylus touched down. That adjustment solved the problem and saved me a $35 feet to have the player checked out. The manual is well written and easy to understand. It is a must have for anyone with this front loading Sony turntable.
Some years back I pruchased a Sansui G-9000. I had it cleaned up and a problem with the left channel repaired. When I got it back I hooked it up to my tape decks, turn tables, TV and it played great. The only thing I was not really satisfied with was the performance of my Graphic Equalizer. I purchased this owner's manual had poured myself a cup of coffee. The manual is well organized and written in plain language. It also contained the solution to my dissatisfaction. By using the preamp connections coupled I was able to run everything through my graphic equalizer and now enjoy the full potential of my complete system.
An excellent service for the price, however, it would also have been handy if the troubleshooter pages were included. The manual is only sent in the language of your country, thus it looks as though there are some pages missing. Otherwise highly recommended.
I am happy to get a rare TECHNICS SH-9090 Owner's Manual by PDF in clear copy.
Text excerpt from page 5 (click to view)
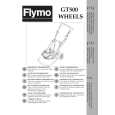
Door reversal (Fig. 3)
Unplug the appliance before all operations. To reverse the door, proceed as follows: dismantle the lower hinge (3), pin (1) and the screw (2); slide the door out from pin (5), unscrew the pin and reposition on the opposite side; unscrew the left front foot and reposition on the opposite side; unscrew the two screws which mask the holes for �xing the hinge from the left front side; reassemble the door; reassemble the lower hinge (turning it 180°), the pin and the screw on the opposite side, as shown in the �gure; dismantle the handle (6) and reassemble it on the opposite side.
2 1 3
D193
Fig. 3
5
6
Fig. 3a
The holes that are not used are to be masked with the plastic plugs removed. Attention After completion of the door reversibility operation, verify that the door gasket is adherent to the cabinet. If the ambient temperature is cold (i.e. in Winter), the gasket may not �t perfectly to the cabinet. In that case, wait for the natural �tting of the gasket or accelerate this process by heating up the part involved with a normal hairdrier.