The only reason I gave this less than 4 stars, is because it shouldn't take 24 hrs to have the download available. I was surprised to find that I had to wait until the next day to be able to download the manual that I paid for.
The manual itself is the correct manual.
hi owners manual- crew,
i am very satisfied about the trade with you.
if i need some other manuals, i will contact you again.
thanks
frank kappler
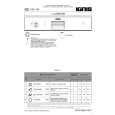
Text excerpt from page 11 (click to view)
Maintenance and Cleaning
You must disconnect the appliance from the electricity supply, before you can carry out any cleaning or maintenance work.
External cleaning
Use only soap and water and then dry thoroughly. Important: do not use methylated spirit, diluents or similar products.
After a while, a withish patina due to detergent residue on laundry forms on the filters. When this occurs, clean the filters with warm water using a brush. Remove the filter in the door opening as per picture (it can be positioned with the tooth facing to the left or to the right).
Cleaning the door
Clean periodically the interior part of the door to remove any fluff from the seals around the filter. Regular cleaning ensures correct drying. Do not use the appliance without filters.
Cleaning the condenser unit
Clean the air condenser when CLOGGED CONDENSER light comes on. The condenser is situated at the lower part of the cabinet behind a small door. To open the door, push the catch as per picture.
Cleaning the filters
Your dryer will only function well if the filters are clean. The filters collect all the fluff which accumulates during drying and they must therefore be cleaned at the end of each programme, before removing the laundry, with a damp cloth. The CLOGGED FILTERS light reminds you to carry out this operation.
During the drying cycle or at the end, it is normal for water to be present on the surface of the condenser insertion . To pull out the condenser, first turn the two red stops downwards as shown below and then remove the condenser unit holding it at the handle.
The filter in the inner door must be removed for cleaning. Do not be alarmed by the amount of fluff. It is not due to excessive wear caused by the dryer. All fabric looses fluff when drying but it goes un-noticed in the air. In a tumble dryer it simply collects in the filter.