|
|
|
Categories
|
|
Information
|
|
Featured Product
|
|
|
 |
|
|
There are currently no product reviews.
 ;
I was searching a way to modify the original phono-in entry (for connection of vynil disc player, with RIAA equalization) to a line-in entry (for connection of modern analog entries, eg. ipod, mp3player).
This service manual gave me the correct hints.
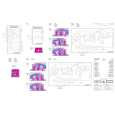
It contains very useful infos for repairing and modifing the hi-fi, such as disassembling instructions, block diagrams, schematic diagrams, PCB prints, replacement parts list.
Very good!
;
Great Job!!! clear and efficient as always!!
it is really nice to have peple that are doing such a good work!!!!!
;
I must admit, I was very skeptical... $4.99 for a 74 page service manual. I've seen some very poorly scanned manuals on the Internet, but this one is VERY good quality! Even when zooming into 500%. Great Deal!
;
Very good detail, Quick service response. A useful service manual with all details. I recomend this service.
;
As Always you can find here manuals even of difficult TV scheme which are scan in almost perfect way.clear and fast!!!!!
Great work thanks!
D
Vorbereitende Arbeiten
GB
Preparatory steps
Bevor Sie den elektrischen Abgleich durchführen, müssen Sie folgende Vorbereitungen treffen: Höhen - Einstellung ........................................................................ 0 Bass - Einstellung .......................................................................... 0 Fader - Einstellung (nicht Lübeck/Luxembourg) ............................ 0 Balance - Einstellung ..................................................................... 0 Loudness - Einstellung (DSC Menü) .............................. 1 oder OFF
Observe the following preparations before performing the electrical alignment: Treble adjustment .......................................................................... 0 Bass adjustment ............................................................................ 0 Fader adjustment (not Lübeck/Luxembourg) ................................. 0 Balance adjustment ....................................................................... 0 Loudness adjustment (DSC menu) .................................... 1 or OFF
Lautsprecheranschlu�
Der Lautsprecherausgang mu� mit 4 � abgeschlossen sein.
Loudspeaker connections
The loudspeaker output must be terminated with 4 �.
Abgleichhinweise
Wellenbereich: FM = 87,5 MHz - 108,0 MHz (100 kHz automatische Suchlaufschritte) (50 kHz manuelle Suchlaufschritte) MW = 531 kHz - 1602 kHz (9 kHz automatische Suchlaufschritte) (9 kHz manuelle Suchlaufschritte) LW = 153 kHz - 279 kHz (9 kHz automatische Suchlaufschritte) (1 kHz manuelle Suchlaufschritte)
Notes on alignment
Waveband: FM = 87.5 MHz - 108.0 MHz (100 kHz automatic search steps) (50 kHz manual search steps)
MW = 531 kHz - 1602 kHz (9 kHz automatic search steps) (9 kHz manual search steps) LW = 153 kHz - 279 kHz (9 kHz automatic search steps) (1 kHz manual search steps)
Für den Abgleich müssen Sie die Stationstasten mit folgenden Frequenzen programmieren: Taste FM1 MHz MW kHz LW kHz 1 98,1 531 162 2 98,1 558 198 3 98,1 558 198 4 98,1 1521 5 98,1 1602 6 91,1
The station preset push-buttons have to be be programmed for the alignment to the following frequencies : Push-button 1 FM1 MHz MW kHz LW kHz 98.1 531 162 2 98.1 558 198 3 98.1 558 198 4 98.1 1521 5 98.1 1602 6 91.1
AM + FM - Abgleich:
Den AM- und FM-Abgleich müssen Sie durchführen, wenn bei einer Reparatur frequenzbestimmende Bauteile ausgetauscht oder verstellt wurden. Nach Reparatur-/ Abgleicharbeiten müssen die Geräteparameter neu programmiert werden.
AM + FM alignment:
The AM and FM alignment has to be carried out if components that determine the circuit's frequency have been replaced or detuned. After a repair or alignment job the basic parameters of the product have to be reprogrammed.
-
-
Abschirmung
Der HF-Abgleich mu� mit Unterdeckel erfolgen. Hierzu ist es ratsam da� Sie an die Me�punkte Leitungen anzulöten. Führen Sie die Leitungen nach oben oder seitlich aus dem Gerät heraus.
Radio-shielding
The r-f alignment has to be performed with the bottom cover in place. It is advisable to solder wires to the measuring points and provide access from the top of the the main board or out through holes in the side of the frame.
-6-
|
|
|
> |
|