|
|
|
Categories
|
|
Information
|
|
Featured Product
|
|
|
 |
|
|
There are currently no product reviews.
 ;
Very well done!!!!! congratulations. It was a bit longer than usual the wiating time even if it was on time (in 24 hours).
;
Last week I bought a second hand BAUKNECHT TRK4850 DRYER. It is a professional machine with many programs and switch options. I feared it would be a huge quest to find a manual. I was delighted when I found owner-manuals.com. After payment I received the file to download the next day already. The quality is great. I am very happy. Thanks!
but kindly the distributions of the operating programs not find in the owners manual,can you help me to understand the operating programs instructions thank you
;
Very good copy, very readable and easy transaction as always.
;
It is perfect, exactly what we needed. It's like the paper version but less clutter.
 ;
Received my manual within 24 hours. Very clear scan of the manual I needed. Thanks!
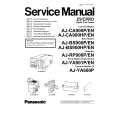
Les commutateurs
Réglage des commutateurs de carte
SW2
8 7 6 5 4 3 2 ON 1 OFF
Carte BS DIGITAL
SW2-1: Commutateur de sélection Y/G, PB/B, PR/R
ON: Sortie Y, PB, PR OFF:Sortie G, B, R
SW2-6: Commutateur de sélection de réglage de la mire de couleur
ON: Mire de couleur SNG OFF:Mire de couleur SMPTE/FULL
<Remarque>
Lors du réglage des commutateurs ci-dessus, bien veiller à ne toucher aucun des autres commutateurs (2-1, 2-3, 2-4, 2-5, 2-7 et 28) et à ne pas modifier leur réglage.
Réglage du micro-commutateur
Pour pouvoir sélectionner le microphone dynamique ou le microphone au carbone, il faudra retirer le couvercle avant Pour effectuer la sélection, voir le schéma ci-dessous.
Microphone dynamique Microphone au carbone
<Remarque>
Quand l�appareil quitte nos usines, ce paramètre est réglé sur le microphone dynamique.
Réglage du contrôleur
Sélectionner le panneau avant ou le contrôleur raccordé au connecteur OP3 pour le contrôleur. Pour effectuer la sélection, voir la figure en bas à droite.
PUSH
<Remarque>
Mettre l�appareil hors tension avant d�effectuer la sélection.
18
FRONT
RCOP CONT
ATTENTION : Ces instructions d�entretien sont exclusivement réservées au personnel d�entretien qualifié. Pour réduire tout risque de choc électrique, n�effectuer aucune autre opération d�entretien que celles qui figurent dans le mode d�emploi, à moins d�être qualifié pour ce genre de travail.
RCOP
Panneau avant
|
|
|
> |
|