|
|
|
Categories
|
|
Information
|
|
Featured Product
|
|
|
 |
|
|
There are currently no product reviews.
 ;
I thank Owen-Manuals.com for the wonderful service rendered to me, and this manual which I purchased helped me a lot in servicing my Denon System, which was lying in a dead state.
Thanks Owner-Manual.com
;
I purchased this manual to repair my Teac set and with the support of this manual I rectified the problem.
Thanks Owner-Manuals.com
;
Excellent service manual, i didn't believe i could find it for such old product, it is very explanatory, managed to fix the disk player!!!
 ;
Nice manual. Clear copy and very rare, to boot. Great price, too!
;
Excellent service manual. Complete service info. with schematics, step-by-step instructions and illustrations. Well worth the price!
AR-DE7
List of different points between the AR-DE7/CS3 and the AR-DD1/DE1/CS1
No. 1 2 3 4 AR-DD1/DE1/CS1 Page 1-1 1-1 1-1 3-5 Item [2]-9 [2]-10 [2]-19 [3]-2-C Content Paper transport speed: 170mm/s � 306mm/s Paper feed speed: 33 sheets/min Power consumption: 24W (MAX) 2. Install the lift up unit. Remove the fixing screw (section 5) of the desk PWB mounting plate, and open the desk PWB mounting plate. Attach the lift up unit to the rear frame of the desk and slide it to the left. Fix the lift up unit with the fixing screws A (3 pcs.) and connect the desk PWB connector to the lift up unit connector. Return the desk PWB mounting plate to the original position, and fix it with the fixing screw (section 5).
Desk PWB mounting plate
AR-DE7/CS3 Change Changed to 432mm/s Changed to 50 sheets/min Changed to 36W (MAX) Change 2. Install the lift up unit. Attach the lift up unit to the rear frame of the desk and slide it to the left. Fix the lift up unit with the fixing screws A (3 pcs.) and connect the desk PWB connector to the lift up unit connector. Desk PWB mounting plate abolished. (Changed to the duplex PWB.) Remark
Desk mounting plate fixing screw
Fixing screw A Desk PWB connector Fixing screw A Lift up unit
Fixing screw A Desk PWB connector Fixing screw A Lift up unit
5
4-1
[4]-2
1) PWB
Illustration changed
Desk main PWB installing position changed. (Changed to the duplex PWB)
2 1
3 4
2 1
3 4
8/6/1999
�1�
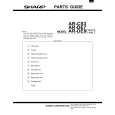 $4.99 AR-CS3 SHARP
Parts Catalog Parts Catalog only. It's available in PDF format. Useful, if Your equipment is broken and You need t…
|
|
|
> |
|