|
|
|
Categories
|
|
Information
|
|
Featured Product
|
|
|
 |
|
|
There are currently no product reviews.
 ;
Great manual, would not have been able to operate my machine without it!!
James Dawson August 18, 2012
;
excellent value & price! Includes everything you need to know about the NN-C777! I would buy this again.
;
Very satisfied! I was searching for several days, but nope; till I discovered your webside and there it was at a very reasonable price. Keep up the good work!
Paul
Flanders
 ;
Generally speaking good copy; a few pages too hard contrast...
Good service and communication.
;
I purchased the unit from a private party and the original owners manual was not available. Having the ability to download it was extremely helpful and clarified operating the equipment immensely. This is a complicated unit and without the manual I would not have been able to maximize it's potential. Thank you.
CONDENSEUR
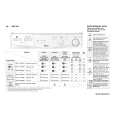
Avant le nettoyage ou toute opération de maintenance, mettez le sèche-linge hors tension. Nettoyez le condenseur au moins tous les trois mois en procédant comme suit : 1. Ouvrez la porte et appuyez sur le bouton du volet du condenseur situé en bas de l�ouverture de la porte. 2. Le volet du condenseur s�ouvre. 3. Déverrouiller le condenseur en tirant la poignée pour la soulever et la sortir de son logement. 4. Enlevez les résidus et les peluches déposés sur les joints et le logement du condenseur. 5. Nettoyez le condenseur sous l�eau courante. 6. Veuillez à garder toujours propre (sans peluches) le logement du condenseur en nettoyant à l�aide d�un chiffon humide. 7. Remettez le condenseur en place en respectant l�orientation du sigle TOP en haut et appuyez sur la poignée pour verrouiller le condenseur. 8. Fermez le volet. Les plaques en aluminium du condenseur peuvent se décolorer avec le temps.
1 2
3
4
9
|
|
|
> |
|