|
|
|
Categories
|
|
Information
|
|
Featured Product
|
|
|
 |
|
|
There are currently no product reviews.
 ;
First class Service,
best quality, come again
Thank You.
vac
;
I didn't realise a manual for an early plasma TV such as the one we were gifted could be so easily obtained. No manual was supplied with it, and as senior citizens we were a little puzzled over some aspects of its use. I do not want a listing for your store credit as we are not fairly big computer users. The manual was well organised, as it should be, with its backing of the Pioneer name. The download was prompt and everything worked quite smoothly. Thank you. Gordon.
;
Thank you very much for the manual. It is what I needed and it will be very helpful to me. The delivery of the manual was easy and very fast. I strongly recommend this site to other users. Best regards.
 ;
Excellent!! Got what I need and very fast!! Thank You
;
Manual acquired with good resolution, complete in all its pages, very good policy of the folder where are saved all products purchased.
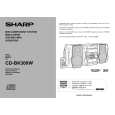
CD-BK300W
Troubleshooting Chart
Many potential "problems" can be resolved by the owner without calling a service technician. If something is wrong with this product, check the following before calling your authorised SHARP dealer or service centre.
Cassette deck
Symptom Cannot record. Cannot record tracks with proper sound quality. Possible cause Is the erase-prevention tab removed? Is it a normal tape? (You cannot record on a metal or CrO tape.) Is there any slack? Is the tape stretched? Are the capstans, pinch rollers, or heads dirty? If a power failure occurs during playback, the heads remain engaged with the tape. Do not open the compartment forcibly. Wait until electricity resumes.
General
Symptom The clock is not on time. When a button is pressed, the unit does not respond. Possible cause Did a power failure occur? Reset the clock. Set this unit to the power stand-by mode and then turn it back on. If the unit still malfunctions, reset it. (Refer to step3 under "If trouble occurs" Is the volume level set to "0"? Are the headphones connected? Are the speaker wires disconnected? Is the karaoke mode set to "L-CH", "R-CH" or "V-CANCEL"?
Cannot erase completely. Sound skipping. Cannot hear treble. Sound fluctuation. Cannot remove the tape.
No sound is heard.
Karaoke
Symptom The vocal part of a multiplexed disc is not heard. Possible cause Is the karaoke mode set to "L-CH", "R-CH" or "V-CANCEL"?
CD player
Symptom Playback does not start. Playback stops in the middle or is not performed properly. Playback sounds are skipped, or stopped in the middle of a track. Possible cause Is the disc loaded upside down? Does the disc satisfy the standards? Is the disc distorted or scratched? Is the unit located near excessive vibrations? Is the disc very dirty? Has condensation formed inside the unit?
Remote control
Symptom The remote control does not operate. Possible cause Is the AC power lead of the unit plugged in? Is the battery polarity respected? Are the batteries dead? Is the distance or angle incorrect? Does the remote control sensor receive strong light?
Tuner
Symptom Radio makes unusual noise consecutively. Possible cause Is the unit placed near the TV or computer? Is the FM aerial or AM loop aerial placed properly? Move the AC power lead away from the aerial if located near.
Troubleshooting Chart
If trouble occurs
When this product is subjected to strong external interference (mechanical shock, excessive static electricity, abnormal supply voltage due to lightning, etc.) or if it is operated incorrectly, it may malfunction. If such a problem occurs, do the following: 1 Set the unit to the stand-by mode and turn the power on again. 2 If the unit is not restored in step 1, unplug and plug in the unit, and then turn the power on. 3 If neither step 1 nor 2 restores the unit, do the following: Press the ON/STAND-BY button to enter the power stand-by mode. Whilst pressing down the button and the X-BASS/DEMO button, press the ON/STAND-BY button until "CLEAR AL" appears.
Caution:
This operation will erase all data stored in memory including clock, timer settings, tuner preset, and CD programme.
Before transporting the unit
1 2 3 4 5 Press the ON/STAND-BY button to turn the power on. Press the CD button. Press the OPEN/CLOSE button to open the disc tray. Remove all CDs inserted in the unit. Press the OPEN/CLOSE button to close the disc tray. Make sure that "NO DISC" is displayed. Press the ON/STAND-BY button to enter the stand-by mode, and then unplug the AC power lead from the AC socket.
�8�
|
|
|
> |
|