|
There are currently no product reviews.
 ;
Nice manual. Clear copy and very rare, to boot. Great price, too!
 ;
Excellent service manual. Complete service info. with schematics, step-by-step instructions and illustrations. Well worth the price!
;
Great product, helped me to restore vintage walkman cassette.
Just some pictures could be little bit more sharp and contrast
Thank you
;
I love older radio's and the service manuals that are sometimes hard to find. Was able to find a manual quite easily on this site.
;
Thank you for your shop manual! Your help was very useful - the device is repaired! Once again - Thank you! I wish you a successful business! Edward (Russia).
�
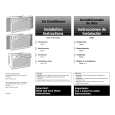
HOW TO REASSEMBE THE POINTER TUN, GEAR TUN AND KNOB RTRY TUN.
KNOB, RTRY TUN GEAR, TUN Turn TUN-CAP fully POINTER, TUN
1. Slot in the POINTER, TUN until point A . 2. With the larger center holes diameter of the GEAR, TUN facing down, insert it into point B followed by point C . 3. Before mounting of KNOB, RTRY TUN confirm POINTER, TUN is fully at point A and turn the TUN-CAP fully, counter-clockwise. 4. Mount the KNOB, RTRY TUN and secure with the screw. 5. TUN KNOB, RTRY TUN to clockwise to confirm POINTER, TUN is able to move to point D .
C
B
AD
6
|