|
|
|
Categories
|
|
Information
|
|
Featured Product
|
|
|
 |
|
|
There are currently no product reviews.
 ;
I purchased the unit from a private party and the original owners manual was not available. Having the ability to download it was extremely helpful and clarified operating the equipment immensely. This is a complicated unit and without the manual I would not have been able to maximize it's potential. Thank you.
;
Being a user of older radios of many kinds, preferring them over more modern rigs, this manual was invaluable in the programming of my two. I now know for certain what the assorted buttons functions are, and am very grateful to have found this excellent site. Many thanks for your assistance, Tony.
 ;
Clear and easy to read. All details as expected. Price acceptable , and quick delivery.
;
Quick response and exactly what I was looking for and at a great fair price!
;
5 star quality on these downloadable manuals. Easy to read and all the information is there. A must when doing a custom install or needing to service your precious old school electronics.
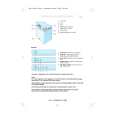
Installation du microphone
Le microphone doit être installé sur la colonne de direction ou dans un autre endroit où il peut capter clairement la voix du conducteur.
� Ce microphone possède des caractéristiques directionnelles : Vérifiez que la surface du microphone fait bien face au conducteur. � Pour garantir une bonne reconnaissance vocale, vérifiez bien que les trous sur les côtés du microphone ne sont pas recouverts une fois mis en place. � Evitez d'installer le microphone à proximité des évents de conditionneur d'air ou dans des endroits exposés aux courants d'air provenant de fenêtres ouvertes. � Le microphone doit être placé entre 20 et 40 cm (8 et 16 in.) de la bouche du conducteur.
1 Retirez le papier de protection du ruban adhésif à double face se trouvant sur la face arrière du clip du microphone et fixez-le ensuite sur la colonne de direction ou dans un endroit où il ne gênera pas le fonctionnement du véhicule. 2 Réglez l'orientation horizontale du microphone de manière à ce qu'il soit en face du conducteur.
Clip du microphone Papier de protection
Vers la bouche du conducteur Surface du microphone
3 Position du câble du microphone.
Ne pas oublier d'éliminer toute trace de graisse ou souillure de la surface de montage avant de positionner ce composant car les caractéristiques adhésives du ruban seront affectées.
<Installation type> Câble du microphone
|
|
|
> |
|