|
|
|
Categories
|
|
Information
|
|
Featured Product
|
|
|
 |
|
|
There are currently no product reviews.
 ;
Great service. Manual is as advertised and delivered when promised.
;
Perfect quality, highly appreciated service !!!
Fast delivery of the download info, no issues at all. Recommended E-manual shop !!!
;
hi owners manual- crew,
i am very satisfied about the trade with you.
if i need some other manuals, i will contact you again.
thanks
frank kappler
;
Full Panasonic service Manual, as described, no problems
;
This place is amazing. Got our manual in a few hours. Print quality is excellent. Even the manufacturer didn't have this manual. The price was excellent. How many more stars can I give them? More than satisfied.
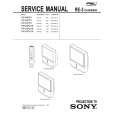
KP- 48PS1/53PS1/61PS1 48PS1K/53PS1K/61PS1K KRM-892
2. Blue Adjustment
1) Place a cap on the red lens so that green and blue colors are displayed. 2) Press �3� button on the commander to select BLU mode. 3) Adjust the following items so that blue lines overlap with green lines. � BLU CENT (horizontally/vertically) Adjust so that the pictures coincide in the center of screen.
Push the joystick to Push the joystick to
� BLU SIZE (horizontally/vertically) Adjust so that each distance from center to left end and to right end is equal. Adjust so that each distance from center to top and to bottom is equal.
Push the joystick to
Push the joystick to Push the joystick to Push the joystick to
Push the joystick to
Push the joystick to
� BLU PIN (vertically) Adjust so that upper and lower horizontal lines on the screen become straight.
� BLU SKEW (horizontally/vertically) Correct the tilt of horizontal lines and vertical lines.
Push the joystick to
Push the joystick to
Push the joystick to
Push the joystick to
� BLU KEY (vertically) Adjust so that upper and lower horizontal lines on the screen become parallel.
Push the joystick to
Push the joystick to
Push the joystick to Push the joystick to
� BLU LIN (horizontally) Adjust so that each space at the right end and at the left end of screen is equal.
4) Press �9� button on the commander to enter the fine adjustment mode. 5) Make fine adjustment so that horizontal lines and vertical lines overlap with green lines. 6) Press �9� button on the commander to return to the rough adjustment mode.
Push the joystick to
Push the joystick to
� 39 �
|
|
|
> |
|