|
|
|
Categories
|
|
Information
|
|
Featured Product
|
|
|
 |
|
|
There are currently no product reviews.
 ;
Exactly as advertized. High quality digital copy of the Nak 610 user manual. Easy download and access. Highly recommended.
;
The manual was exactly what I wanted and I found it nowhere else. Thanks!
;
Having purchased a 1994 Kenwood music system from a Charity shop in 2013 (it was a high end product in its day), I found myself not quite knowing where to plug in what, and how to do this, that and the next thing. I needed a Manual, and after failure with another online 'Manual provider' I found Owner Manuals dot com. Well, I wasn't sure, but it was only $5, and if things didn't work out, I wouldn't have lost much...
But things DID work out. After paying my childrens inheritance money, $4.99, I was sent a Manual for my Kenwood System very quickly. Alas, it was in German, and being Scottish, I could not read it or get my system in order from it...a rapid email to them brought the English Manual in short order, and my retro-system was and IS up and running in it's regulation settings.
I am very grateful to http://www.owner-manuals.com for their quick service and for even having such an obsolete Manual in the first place! If you need a Manual for ANYTHING, try here first. I wouldn't be surprised if I bought a 1928 Marconi radio, and got the user Manual for THAT here too!
Top marks.
John Copeland
Glasgow
Scotland
;
I was so happy that the owner's manual was available. It is well written and helped me to use the radio/CD player/recorder without problems. Thanks for making it available.
Irene Lambert
;
Excellant!!! Very quick and easy....Best $4.99 I have spent in a very long time..
I highly recommend this.
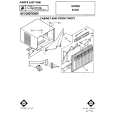
Les blocs en mousse qul sont fournls sont destlnCs i retenlr itroltement le panneau de rempllssage contre le rofll en U de la fenCtre. Dhcouper le Elot de 6,4 mm (�A po) plus large que le profll en U et I�enfoncer en place. I
10. Placer I�habillage dans la fenQtre en tournant I�habillage sur un c6te pour mettre un panneau de remplissage dans le profil en U de la fenetre. Manoeuvrer maintenant I�autre panneau de remplissage dans le profil en U de la fenetre. En passant la main par I�ouverture de la fenetre, pousser les panneaux de remplissage depuis I�exterieur vers vous aussi loin que possible. Ouvrir les glissieres laterales de montage au dehors dans le profil en U de fenetre en des deux cot&. Ouvrir I�habillage vers vous pour installer les glissieres laterales de montage tous en avant dans les profils en U de fenetre test possible. Suivante, faire un rep&e et perter un trou pilote (2,4 mm [3/z PO]) dans chaque glissiere laterales de montage pour les vis. Les vis sont utilise pour attacher les glissieres laterales de montage dans les profils en U de fenetre. S�assurer que vous utilisez les blocks de mousse qui sont fournis. S�ASSURER QUE L�HABILLAGE PAS PAR LA FENiTRE. NE TOMBE
posbesdesdeux c&5s
11. Abaisser la fenQtre et mettre le climatiseur de niveau. Abaisser fermement la fenetre derriere le joint de fenetre. Mettre I�habillage de niveau nest pas necessaire dans une installation normale etant donne que la pente appropriee est prevue dans le produit. Toutefois, s�assurer que vous avez environ I/Z bulle (6,4 mm [�A PO]) d�inclinaison vers le bas vers I�exterieur pour la vidange convenable de I�eau. Si necessaire, repositionner ou caler I�habillage pour donner I�inclinaison appropriee ou la mise a niveau d�un cbte a I�autre. Serrer maintenant les 4 vis de panneau de remplissage. S�assurer que la bride du bas est placee contre I�arriere de I�appui de la fenetre pour obtenir une bonne etancheite. Finalement, perter 2 trous de positionnement (2,4 mm [3/z PO]) dans I�appui de la fenetre, en se servant des trous dans I�habillage comme guide. Utiliser 2 vis a bois pour fixer le fond de I�habillage dans I�appui de la fenetre. suite B la page suivante
15
|
|
|
> |
|