|
|
|
Categories
|
|
Information
|
|
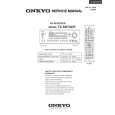
Featured Product
|
|
|
 |
|
|
There are currently no product reviews.
 ;
A comprehensive Operating and Service Manual. All schematics are complete and easy to read. The PCB drawings and complete parts list are very helpful. I would definitely recommend this manual.
;
SCANNING OF HIGH QUALITY
VERY, VERY HIGH VELOCITY DOWNLOAD
VERY GOOD PRICE,
TRUE SATISFIED, THANKS
;
Genuine Toshiba owner's manual. Couldn't really ask for more. And written in understandable English in contrast to a few recent experiences I have had with manuals for other equipment other than Toshiba but made in China and written in "Chinglish"!
;
I purchased a vintage Sony mixer off eBay and within the hour was able to locate and purchase the manual for it.I mean really,where else can you find a manual for a product made in 1983!? It was easy to find and purchase/download the manual I needed.I will use this site again for other equipment I have! Great site!
;
manual de usuario perfecto y completo de buena calidad de impresion y muy detallado ideal !
TX-SR702,602_Fr.book Page 75 Tuesday, July 27, 2004 9:08 AM
Réglages plus avancés�suite
6-3. OSD Setup
â� a. Immediate Display Cette préférence déï¬�nit si les actions comme le choix dâ��une source dâ��entrée sont afï¬�chées ou non à lâ��écran. Normal: Sélectionnez ce réglage pour afï¬�cher les opérations dans lâ��angle inférieur droit dâ��un téléviseur 4:3. Wide: Sélectionnez ce réglage pour afï¬�cher les opérations dans lâ��angle inférieur droit dâ��un téléviseur 16:9. Off: Les actions ne sont pas afï¬�chées. Quand vous reproduisez un signal vidéo dâ��une source vidéo composante, les actions ne sont pas afï¬�chées à lâ��écran, même si cette préférence est réglée sur â��Normalâ�� ou â��Wideâ��. â� b. Scan Mode Si le texte est instable par manque de compatibilité avec le dispositif dâ��afï¬�chage branché (téléviseur, projecteur etc.), réglez â��Scan Modeâ�� sur â��Non-Interlacedâ��. Interlaced: Par défaut. Non-Interlaced: A sélectionner si lâ��image est instable. â�¢ Avec certains dispositifs dâ��afï¬�chage, lâ��option â��NonInterlacedâ�� peut empêcher lâ��afï¬�chage des menus de réglages. Dans ce cas, servez-vous de lâ��écran de lâ��ampli-tuner AV et recommencez lâ��opération pour revenir en mode â��Interlacedâ��. Utilisez les boutons haut/bas [ ]/[ ] pour choisir une source dâ��entrée puis sélectionnez lâ��une des options suivantes avec les boutons gauche/droite [ ]/[ ]: Auto: PCM, Dolby Digital et DTS. Si le signal numérique fait défaut, lâ��entrée analogique est automatiquement utilisée. DTS: Choisissez cette option si la lecture dâ��un CD DTS avec lâ��option Auto produit du bruit pendant que le ampli-tuner AV identiï¬�e le format DTS ou pendant lâ��avance et le recul rapides. Tout signal dâ��entrée de format autre que DTS ne produit pas de son. PCM: Choisissez cette option si le début des plages est omis lors de la lecture dâ��un CD ou dâ��une autre source PCM avec lâ��option Auto. Tout signal dâ��entrée de format autre que PCM ne produit pas de son. â�¢ En cas dâ��absence de signaux numériques, seul â��Autoâ�� est afï¬�ché. â�¢ Sélectionnez Auto ou DTS avec un CD ou LD DTS. Si vous choisissez PCM, vous nâ��entendez que du bruit.
Changer l�ID de la télécommande
Ce réglage peut être nécessaire lorsque la télécommande entre en con�it avec d�autres éléments d�Onkyo situés dans la même pièce. Pour éviter ce problème, vous pouvez changer le numéro d�identité (ID) de la télécommande. Remarques: Si vous changez l�identité (ID) de la télécommande, veillez à choisir la même ID sur l�ampli-tuner AV et la télécommande (voyez colonne de gauche). L�ID par défaut des deux éléments est 1.
6-4. Remote Setup
â� a. Remote ID Avec ce paramètre, vous pouvez changer lâ��identité (ID) de la télécommande de lâ��ampli-tuner AV. Ce réglage peut être nécessaire lorsque la télécommande entre en conï¬�it avec dâ��autres éléments dâ��Onkyo situés dans la même pièce. â�¢ Si vous changez lâ��identité (ID) de la télécommande de lâ��ampli-tuner AV, veillez à choisir la même ID sur lâ��ampli-tuner AV et la télécommande (voyez colonne de droite). Lâ��ID par défaut des deux éléments est 1. â� b. IR IN Position Si vous utilisez un lâ��ampli-tuner IR disponible dans le commerce, utilisez ce paramètre pour spéciï¬�er où il se trouve. Main: Choisissez cette option si lâ��ampli-tuner IR se trouve dans la pièce principale. Zone 2: Choisissez cette option si lâ��ampli-tuner IR se trouve dans la zone 2 et pilote cette dernière.
1
Boutons numériques
1
6-5. Digital Format
Ce réglage ne s�applique qu�aux sélectiones d�entrée assignées à une entrée numérique. Ce paramètre permet de dé�nir si les entrées numériques acceptent des signaux DTS, PCM ou Auto. Vous pouvez effectuer ce réglage individuellement pour chaque sélection d�entrée.
1 2
Maintenez le bouton [RECEIVER] enfoncé puis appuyez sur le bouton TV [INPUT]. Composez les 4 chiffres de l�ID de la télécommande avec les boutons numériques. Vous avez le choix parmi 1, 2 ou 3.
Fr-75
|
|
|
> |
|